原本部落格文章的新增或更新需要修改檔案,就在想有沒有像是 Wordpress 那種有後台能夠直接新增文章的功能可以使用,翻一下 google 就找到一個蠻多人用的 Netlify CMS,嘗試導入這個部落格後覺得真的很方便。能夠在原本的網站中新增一個控制台管理文章,文章的新增/修改/刪除只要一鍵就幫你完成 commit, publish, deploy 這些步驟,雖然原理還沒有很深入了解,但不用每次開 VSCode 起來改檔案新增文章就是舒服啦(已知用火)!
導入流程
建立 GitHub OAuth APP
前往 GitHub Dev Settings 建立 GitHub OAuth APP,使用這個 CMS 時會需要登入自己的 GitHub。
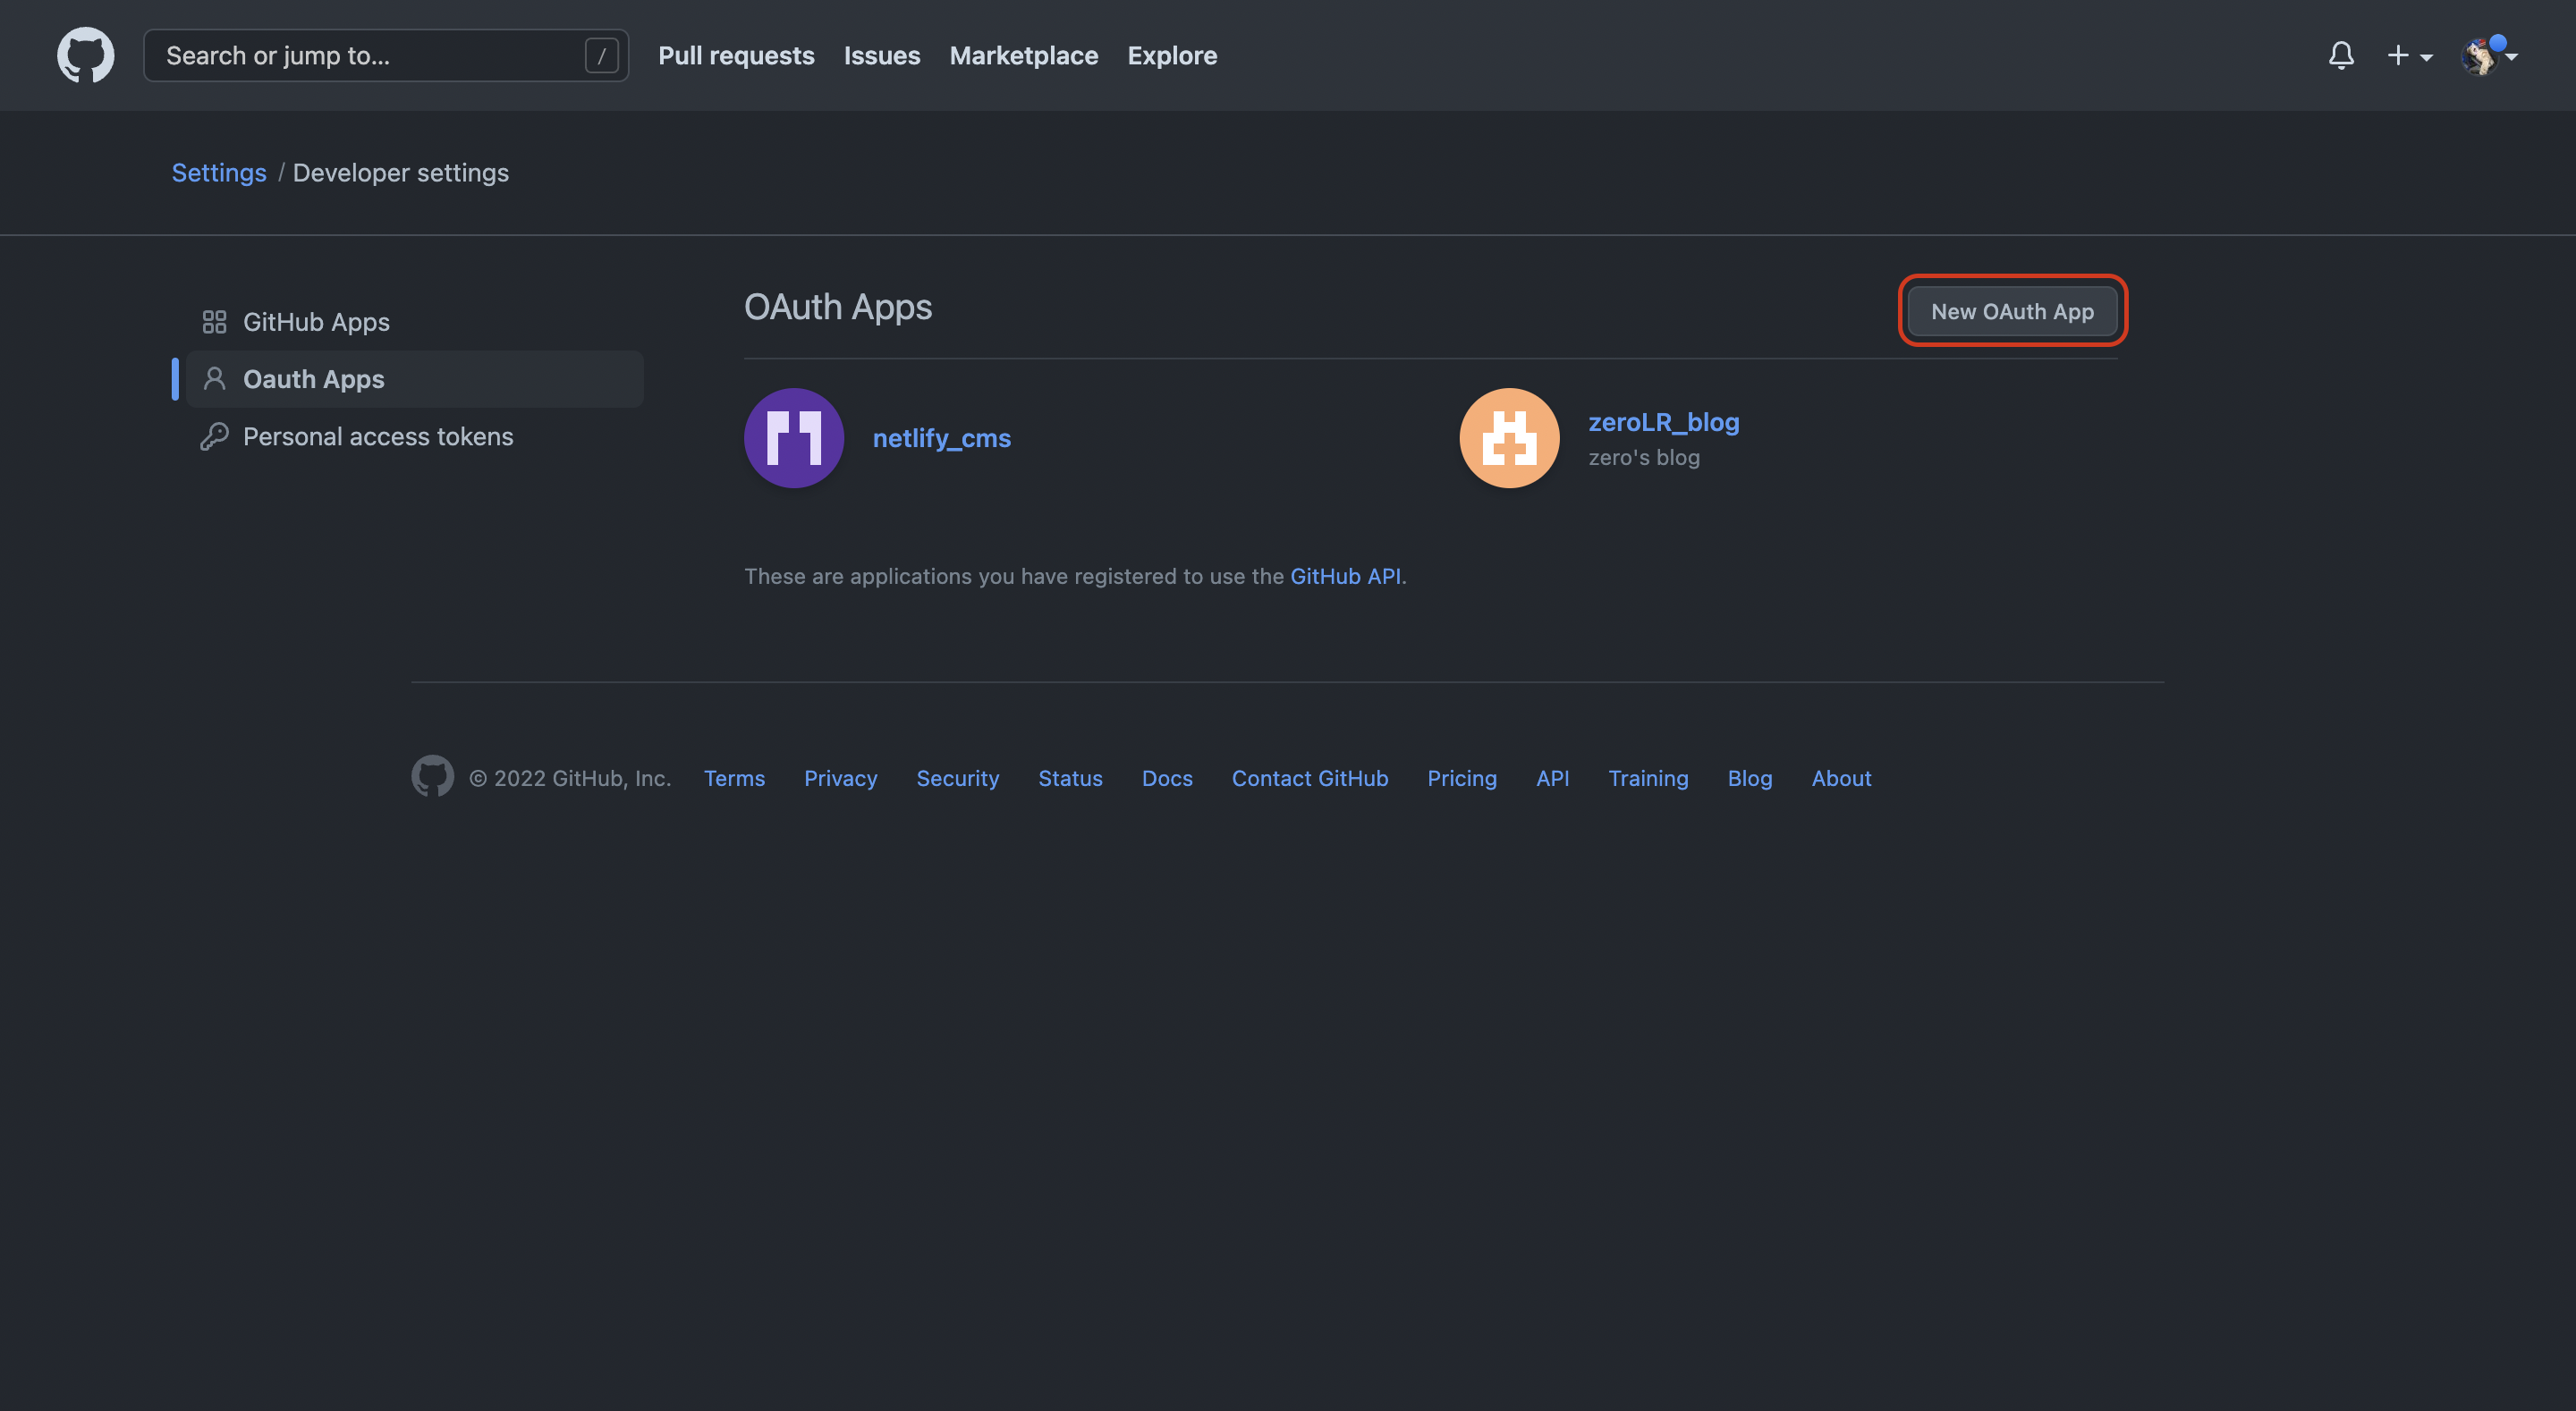
Authorization callback URL 填入https://api.netlify.com/auth/done,透過 GitHub OAuth APP 登入時取得的 Access token 會再拿去 Authorization callback URL 這個 API(Serve-to-server)驗證。
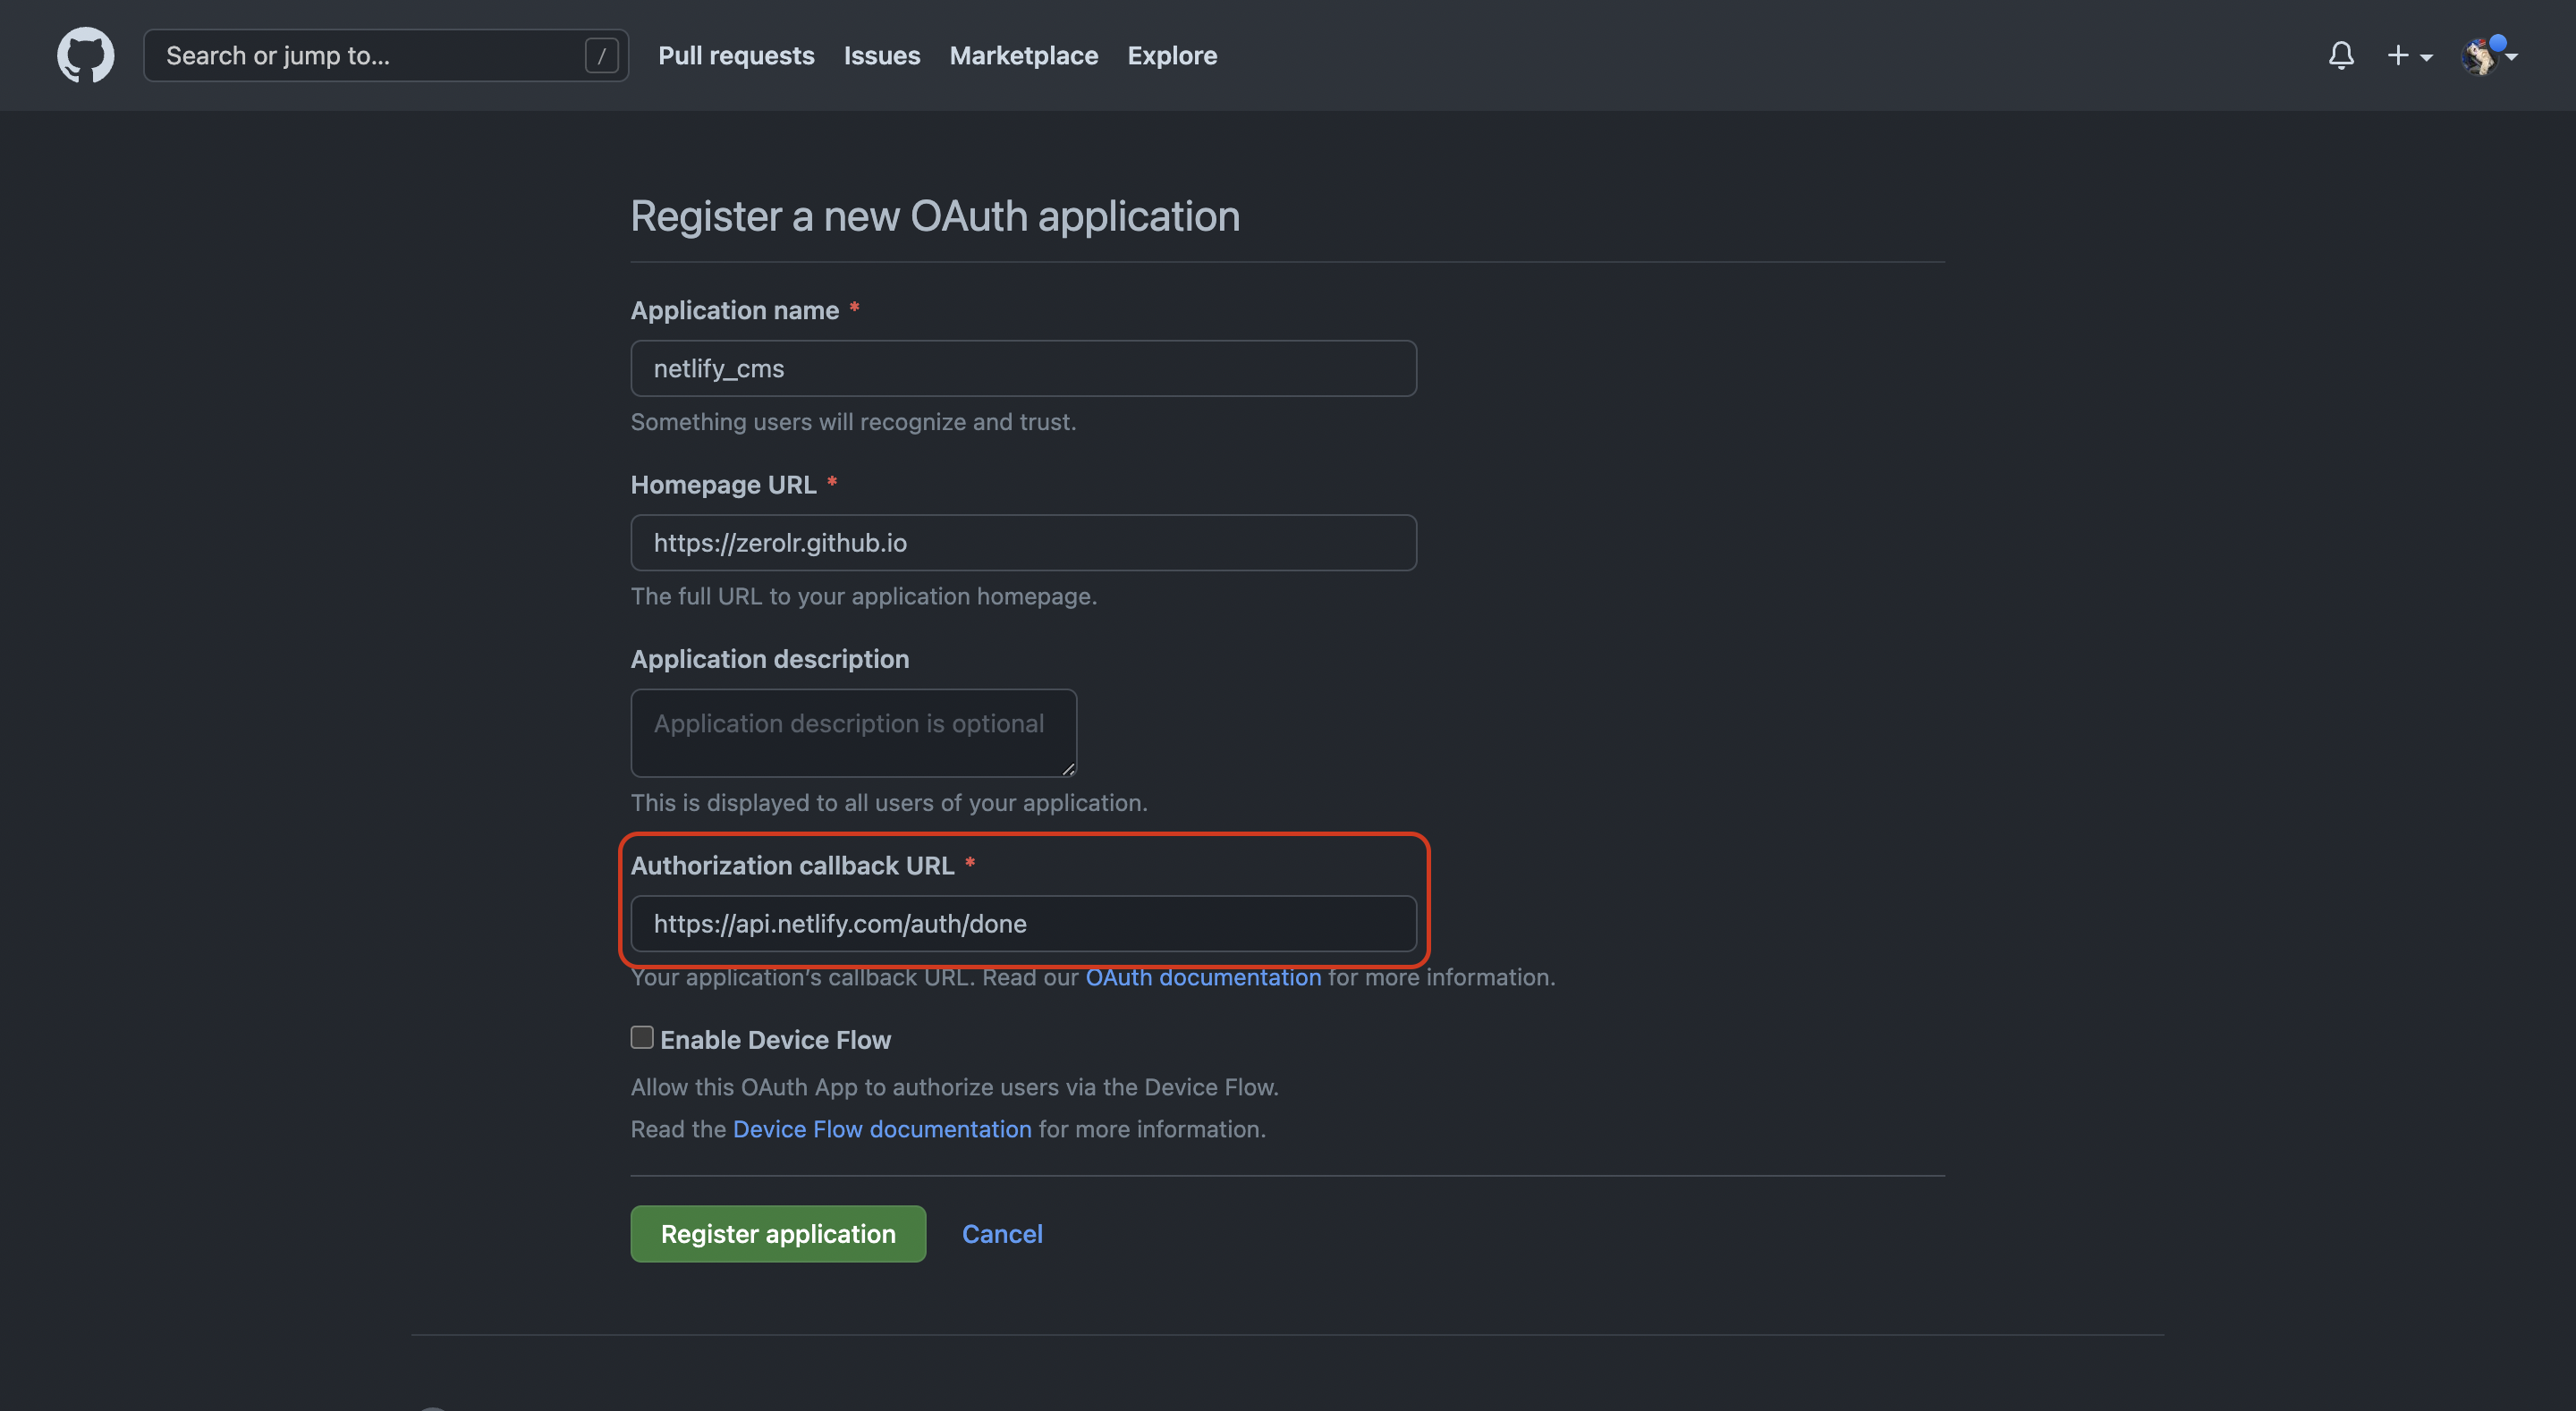
Netlify 註冊 Provider
前往 Netlify 建立一個網站,repo 任意選擇即可,網站並不會部署在選擇的 repo 上。
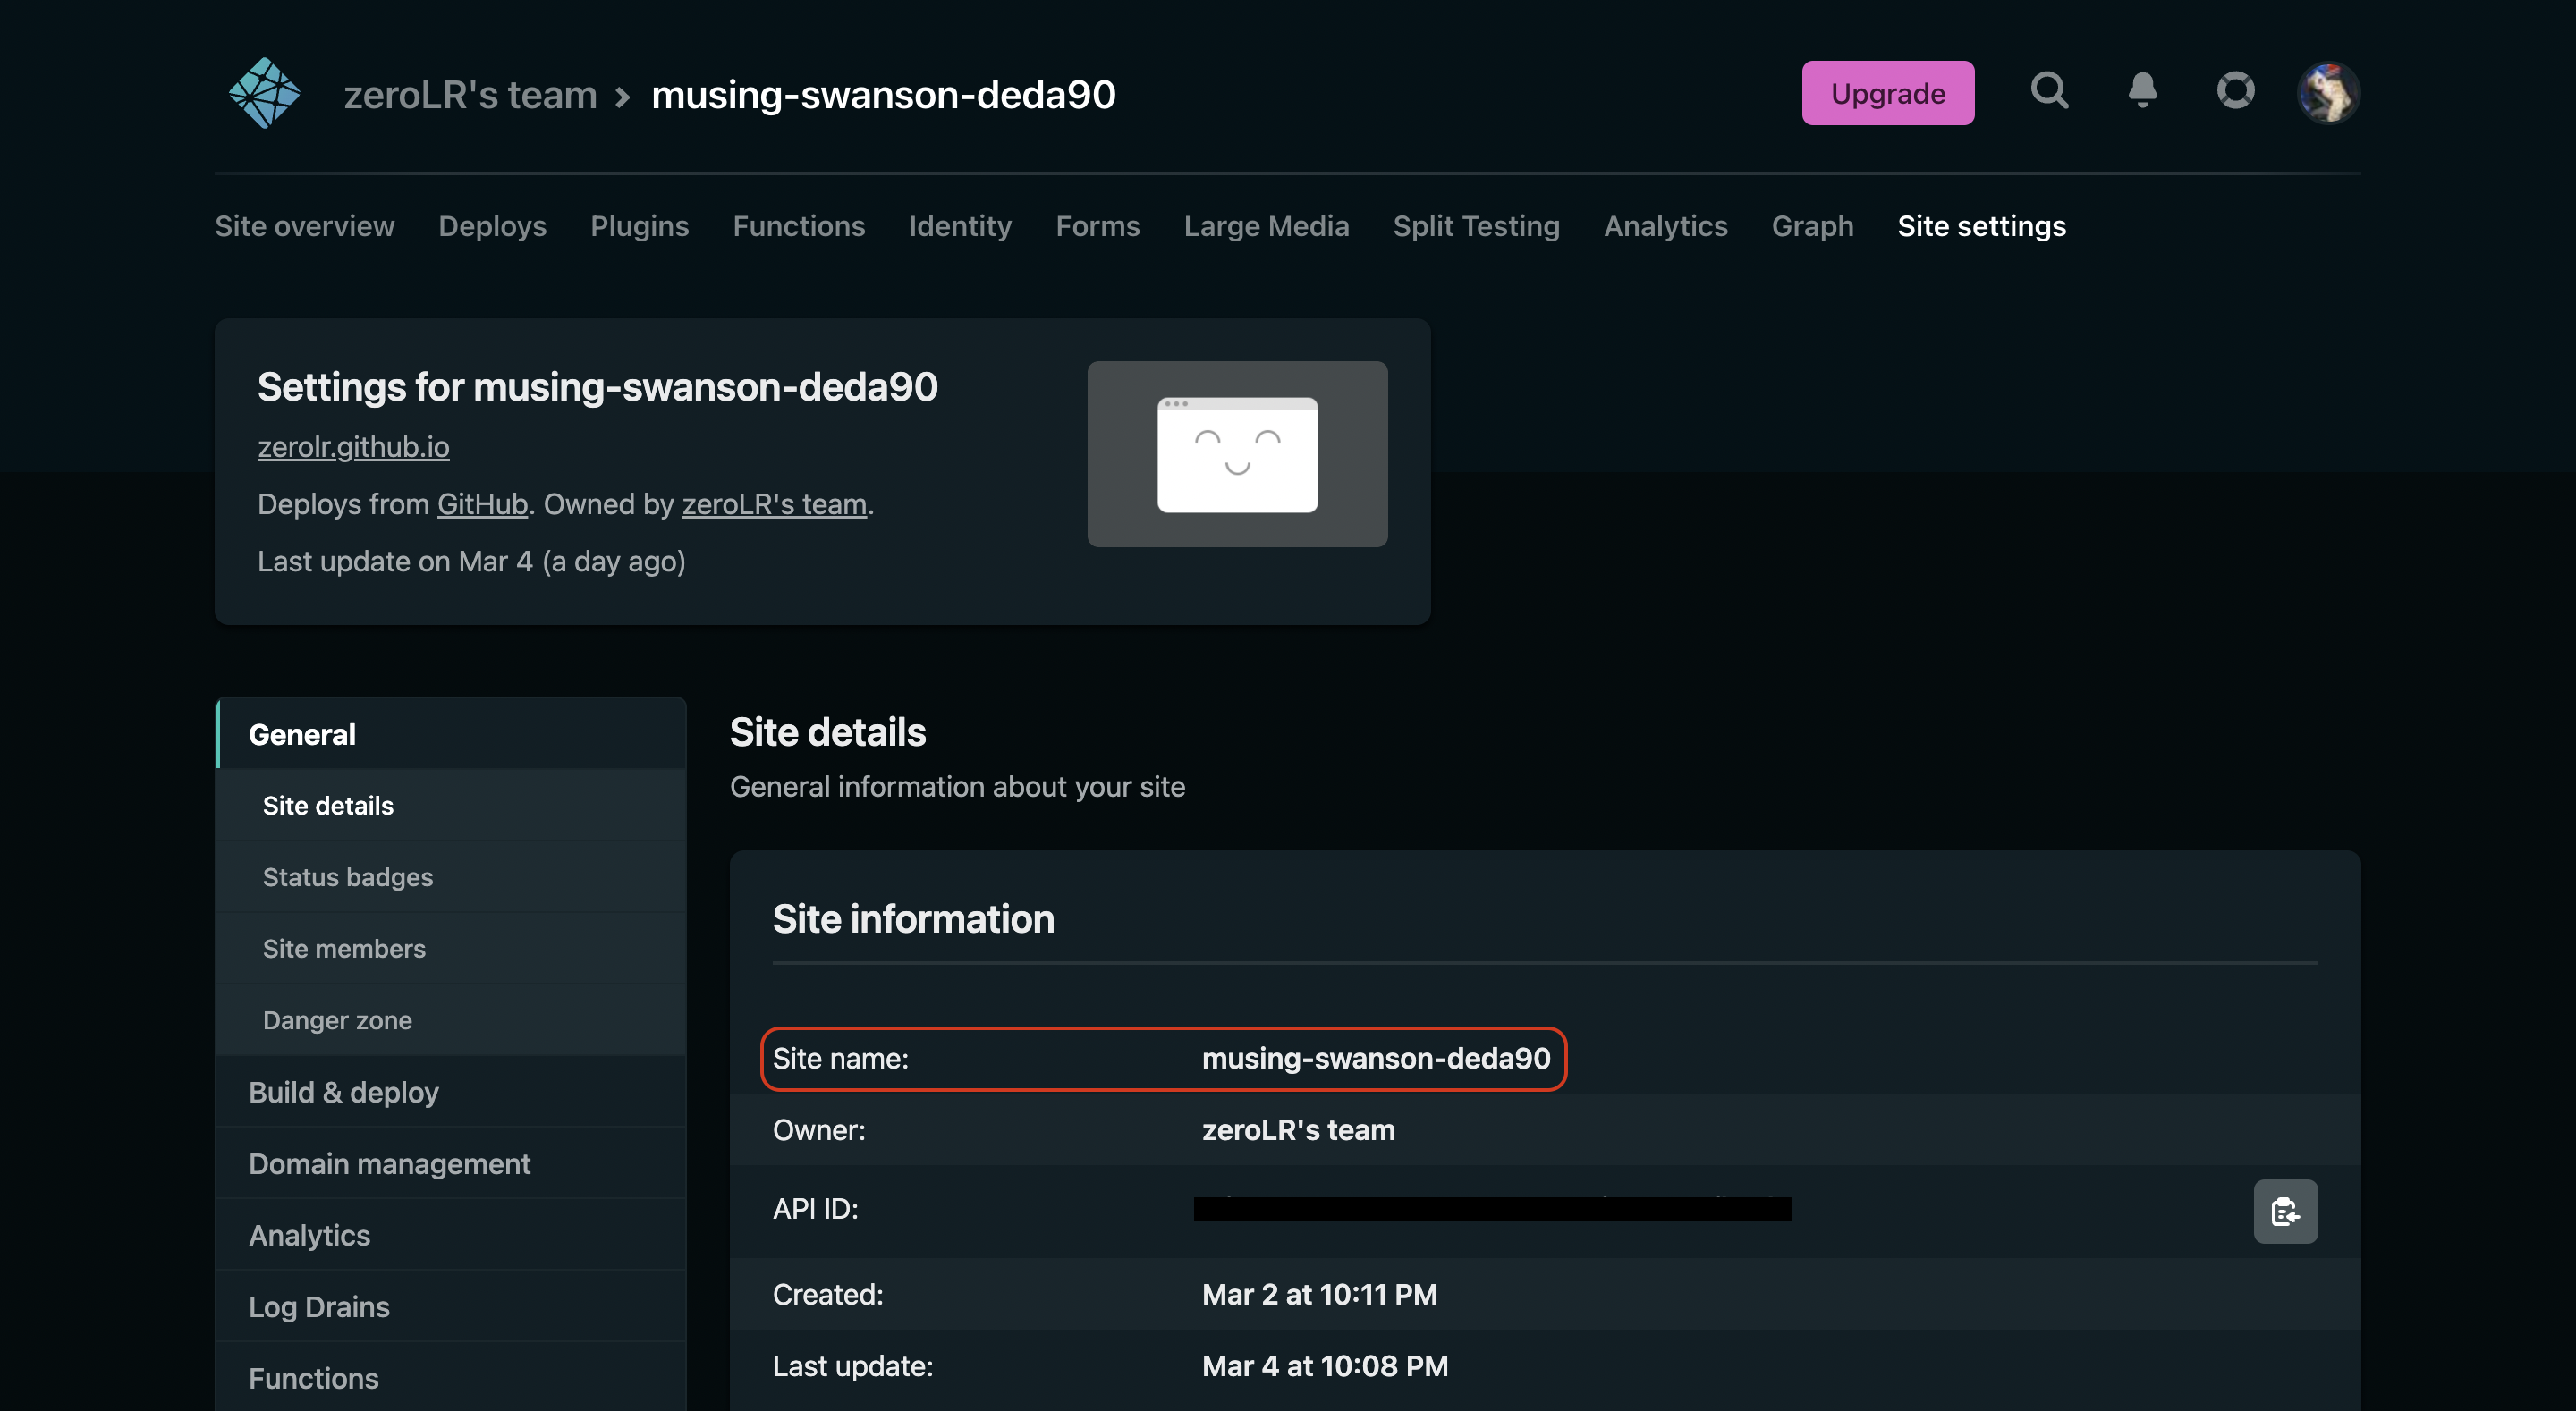
前往 Site settings ,記下這個網站的名稱後面會用到,格式應該長得像 octopus-cat-123456。
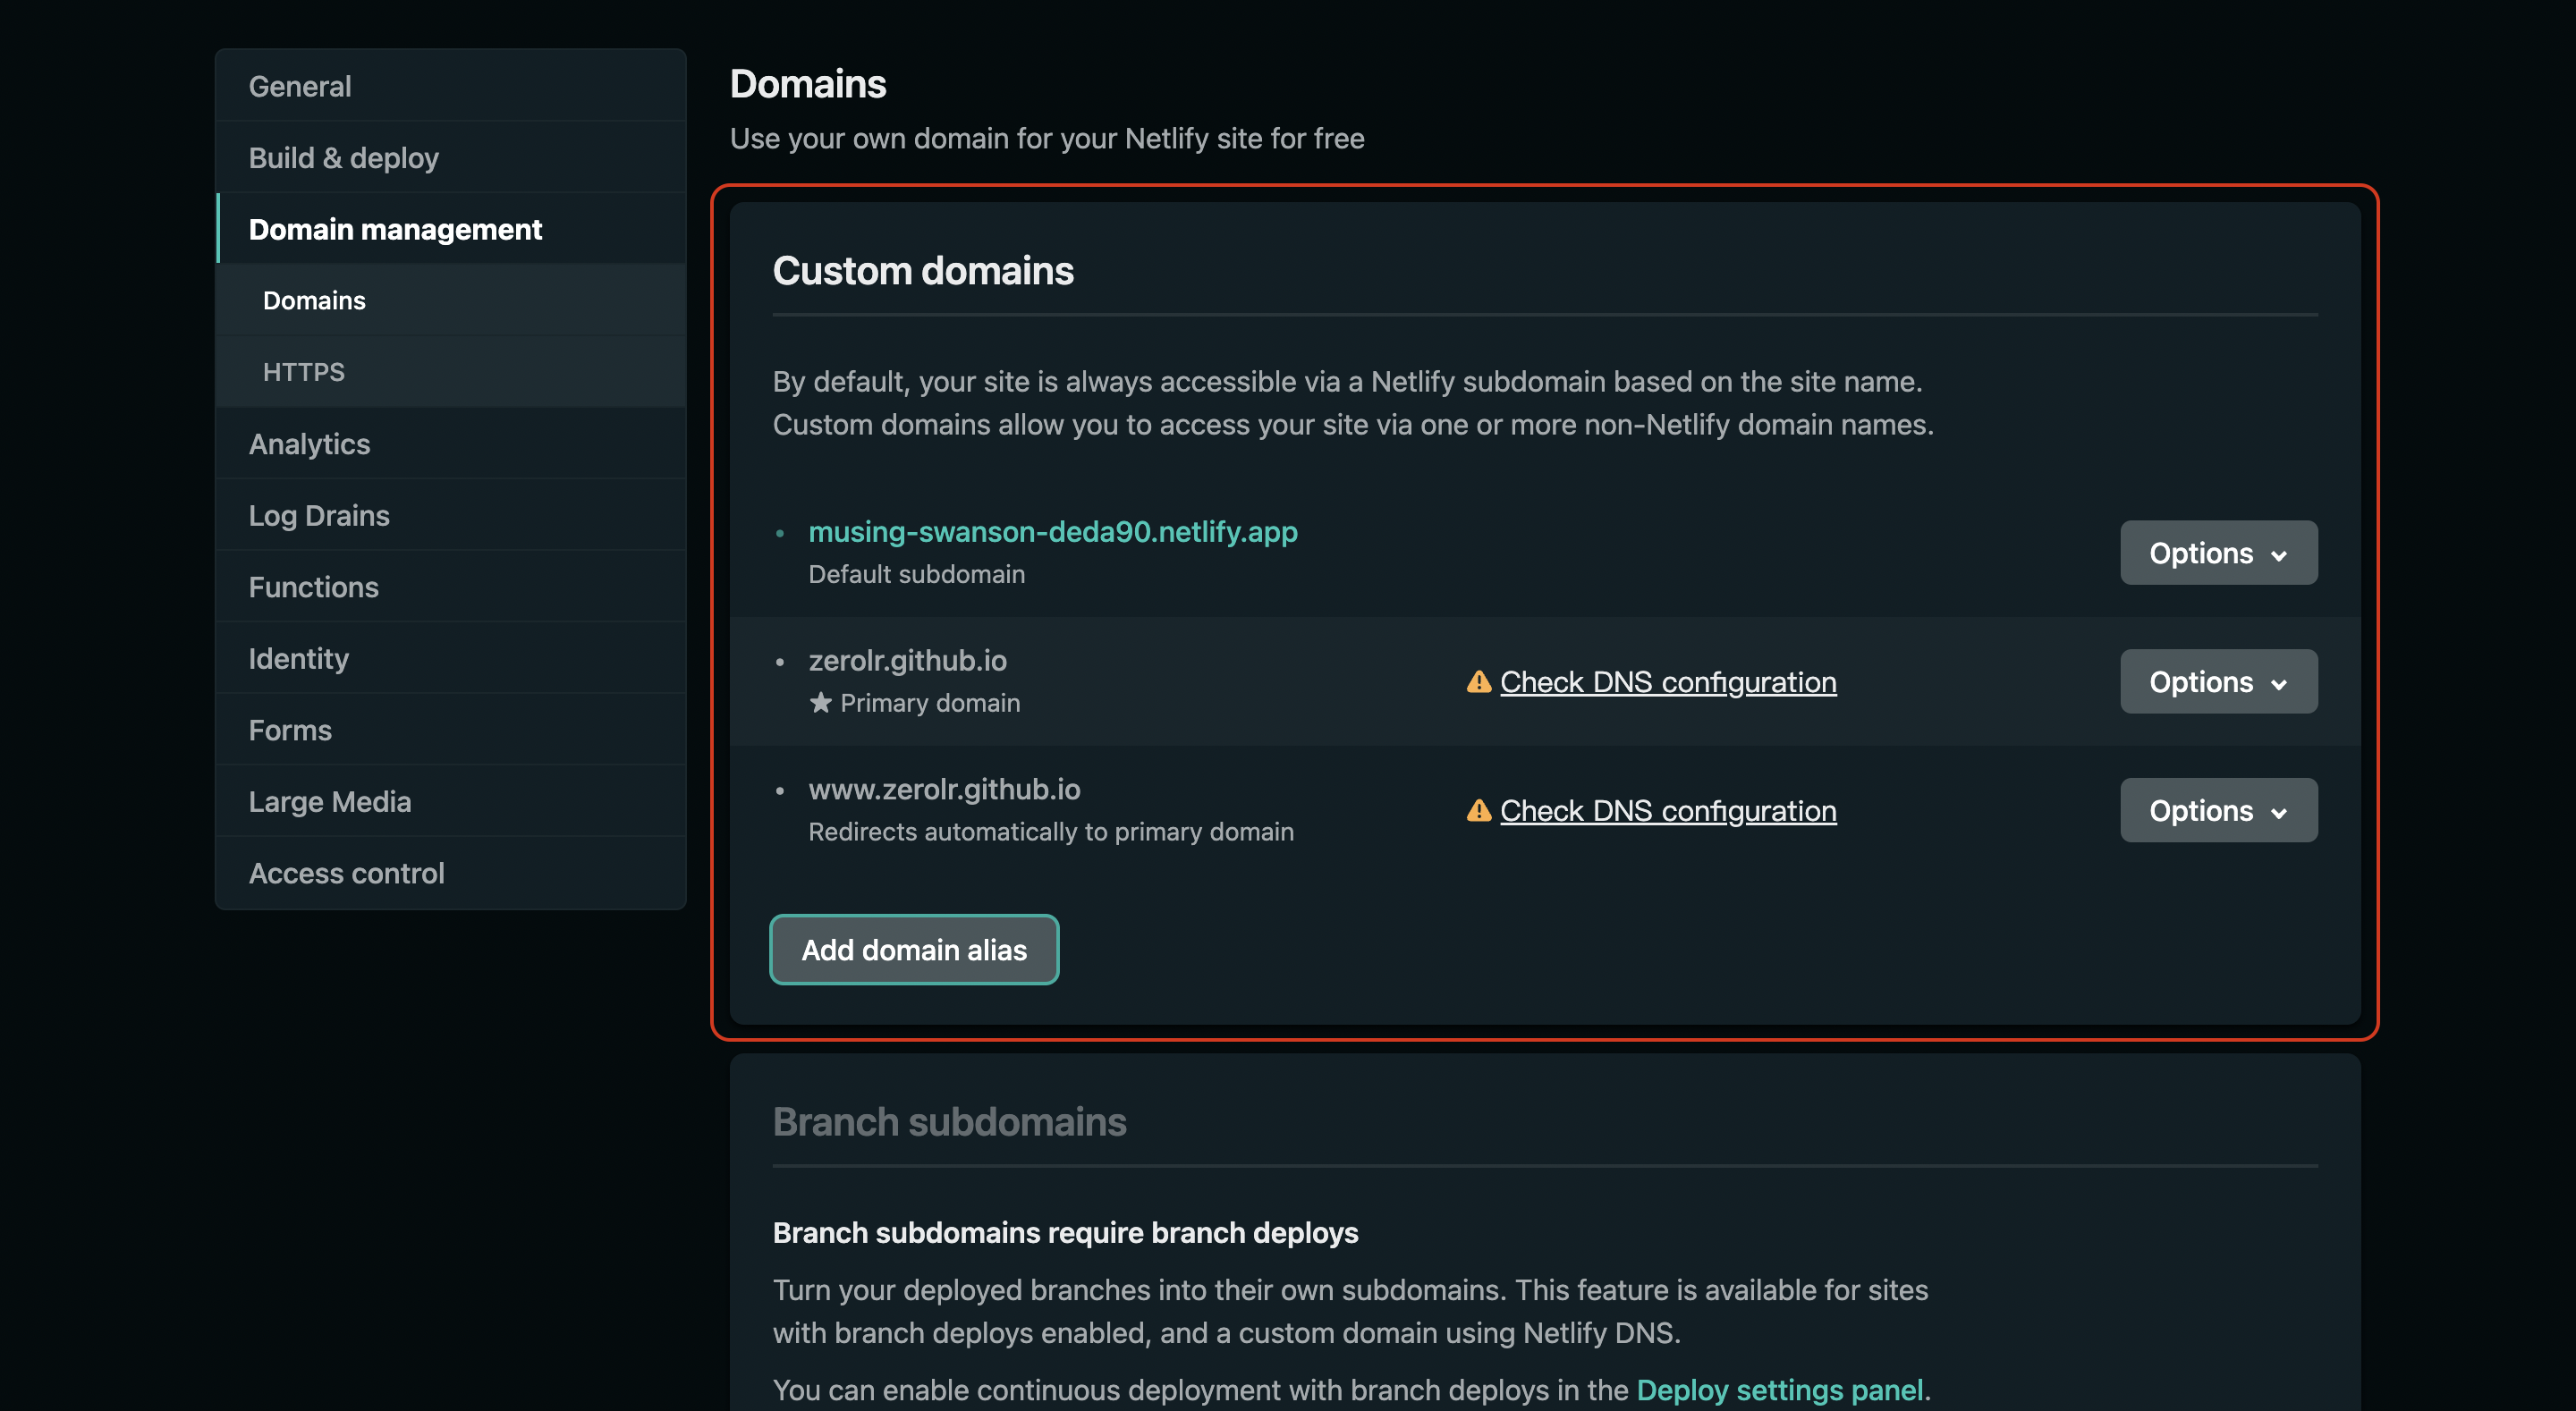
側邊欄選擇 Domain Management ,新增 Custom domains 為 you.github.io 。
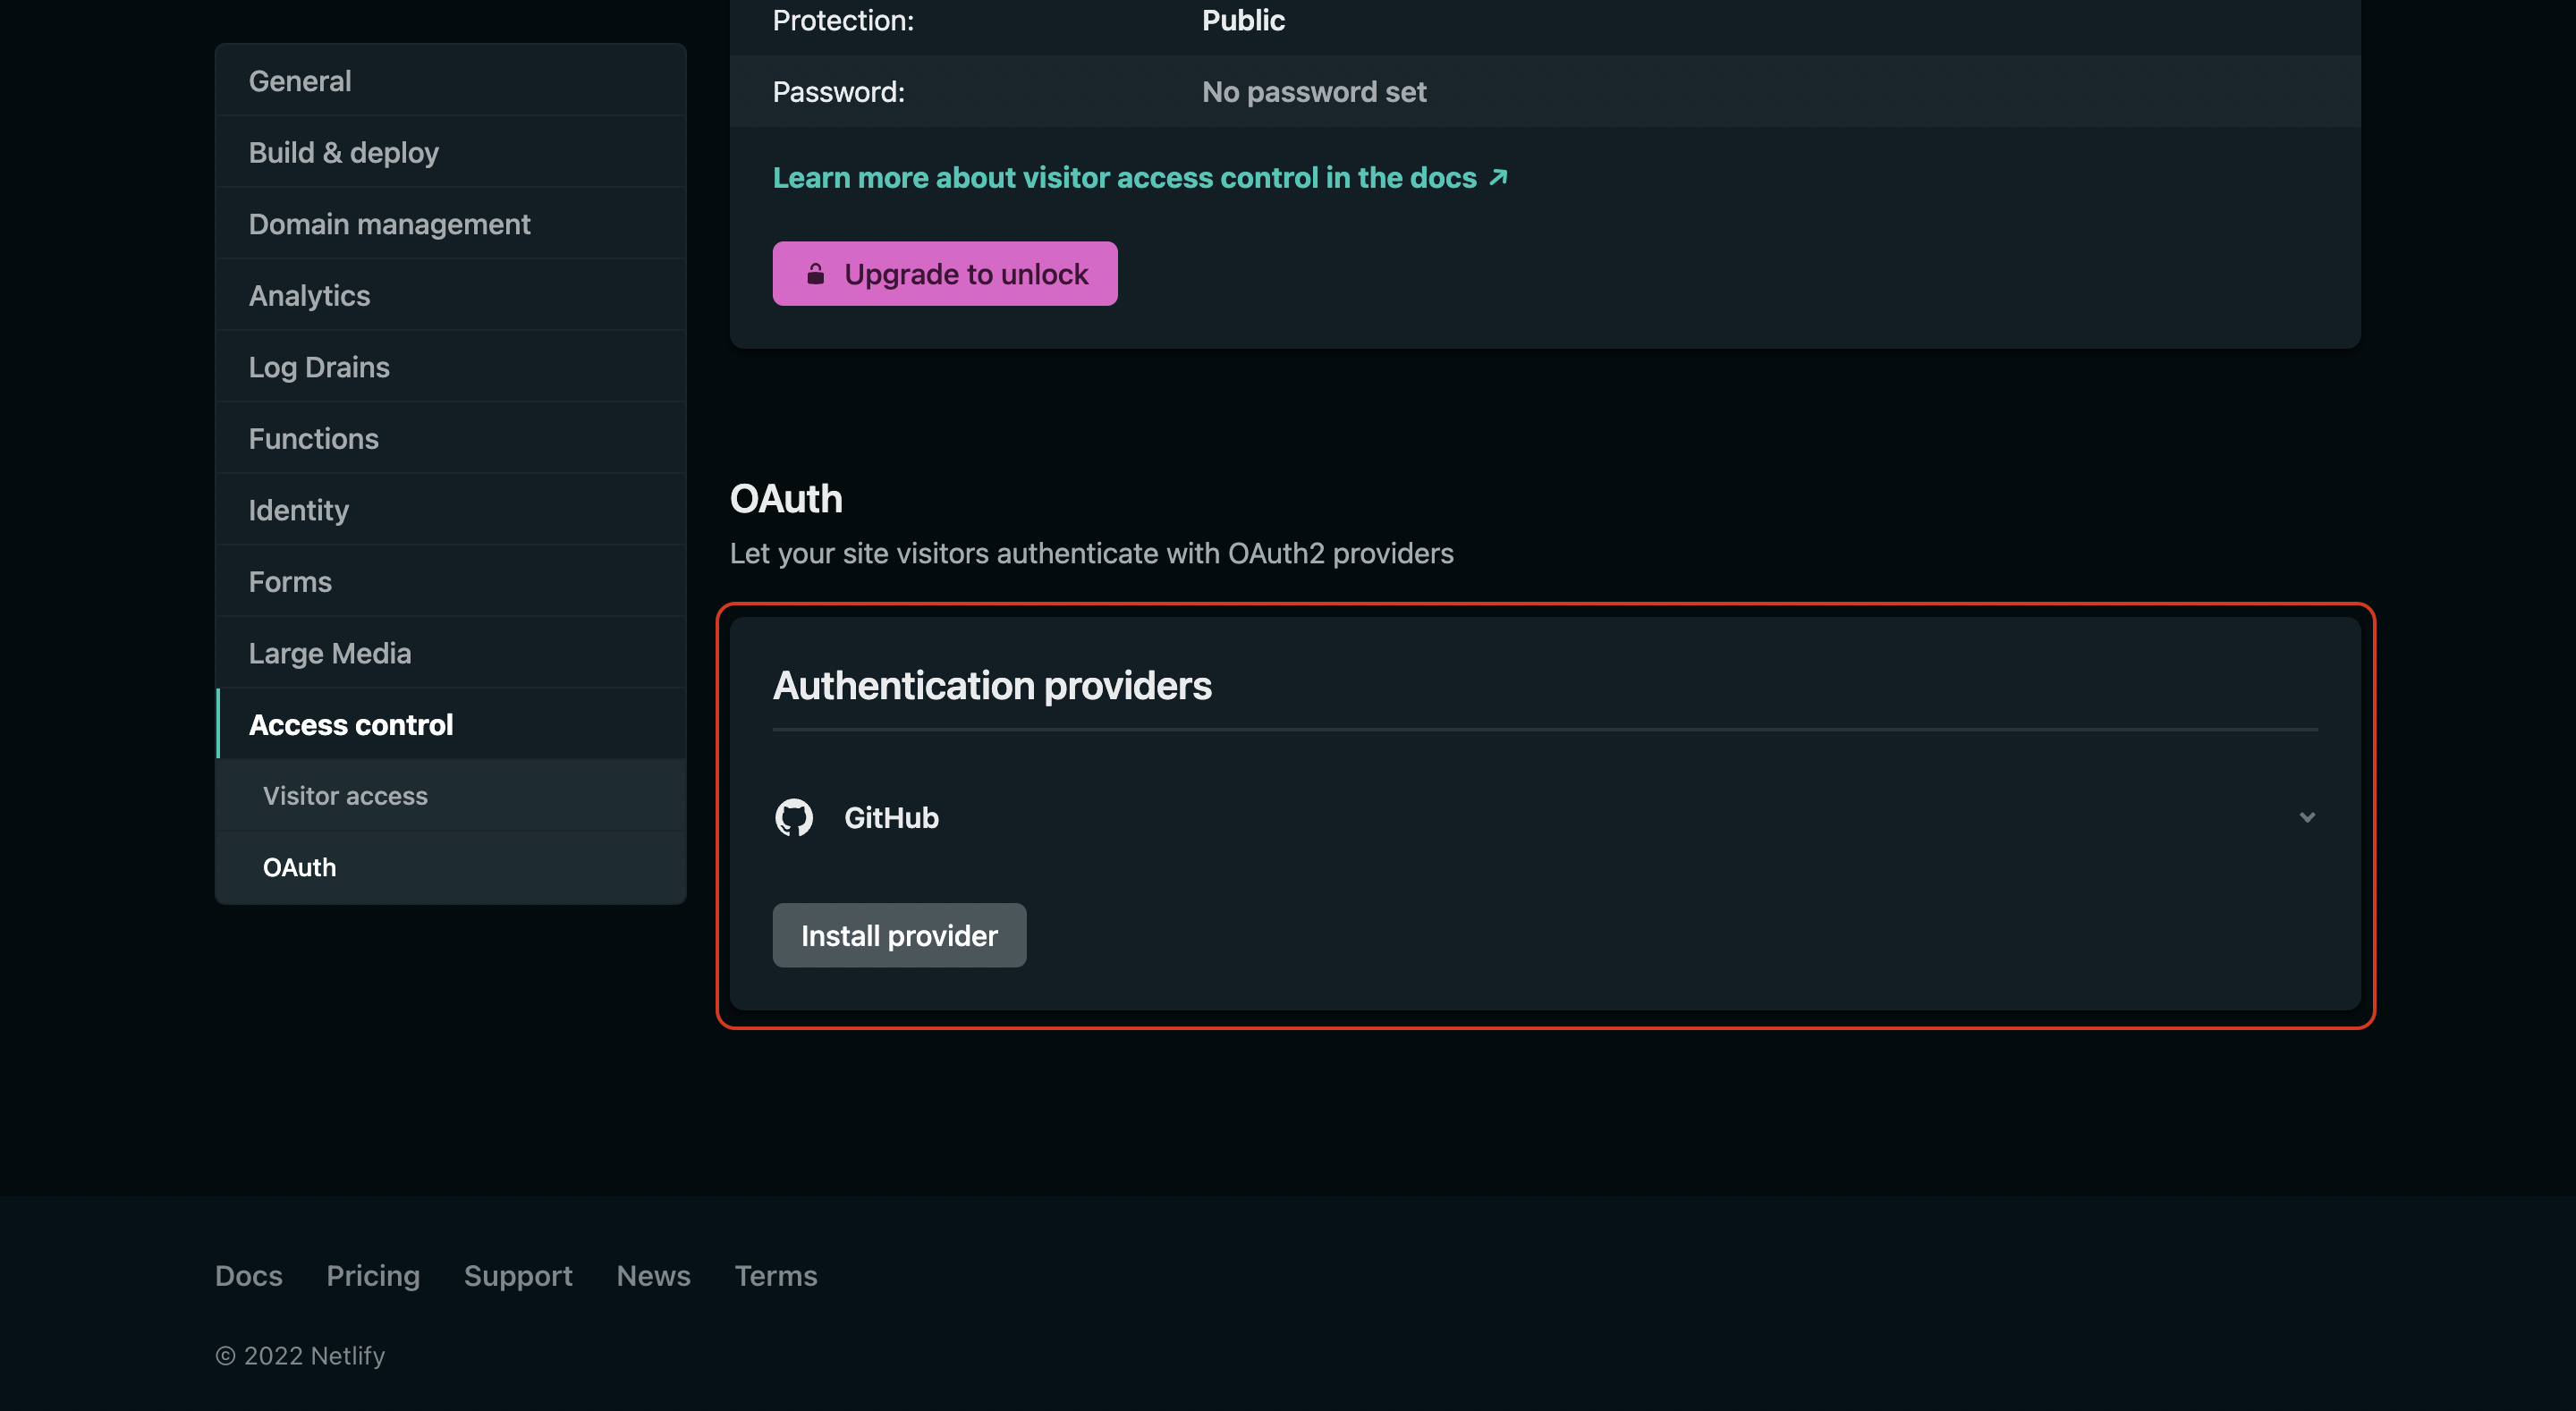
側邊欄選擇 Access control ,選擇 OAuth ,點擊 Install provider。
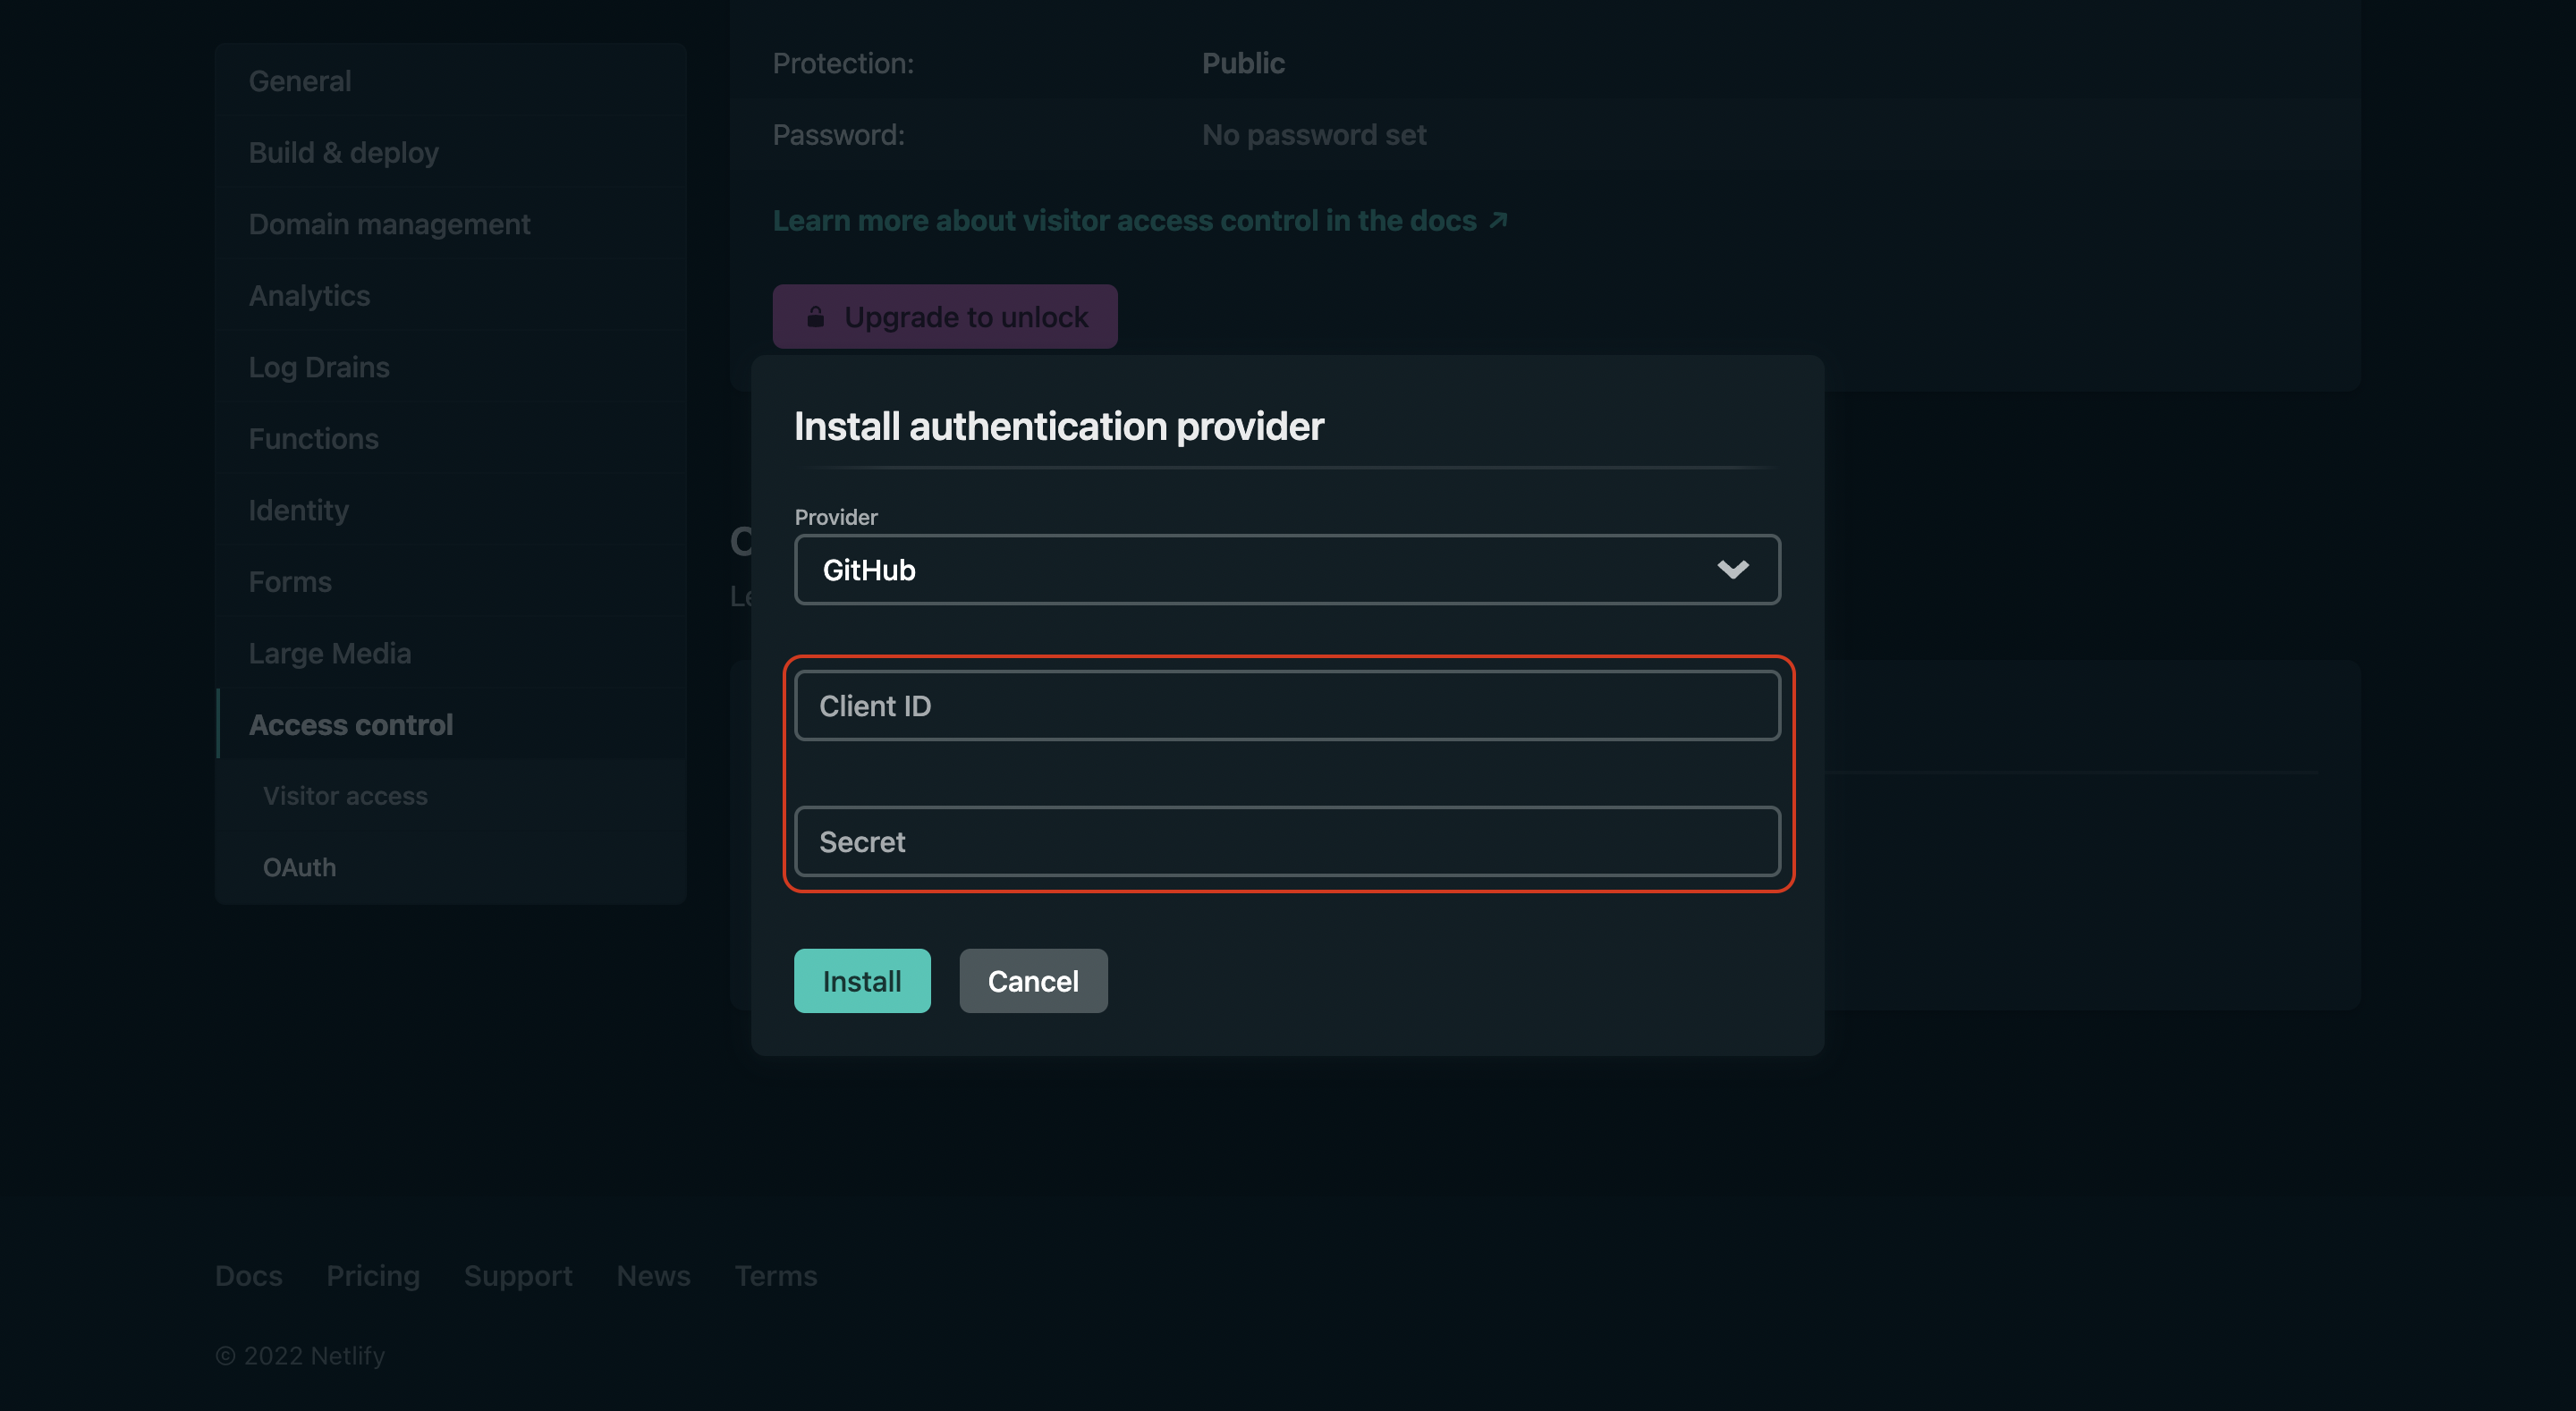
Provider 選擇 GitHub,輸入從 GitHub OAuth APP 中的 Client ID 與 Client Secret。
在網站中啟用 Netlify CMS 管理頁面
在自己部落格的根資料夾中新增 admin 資料夾,建立 index.html 與 config.yml,內容如下,在 config.yml 中記得將 repo 與 site_domain 修改成自己的部落格與剛剛記下的 Netlify 網站名稱,以及要注意自己部落格的 branch 是否跟 config 中的相同。
admin/index.html
 1
 2
 3
 4
 5
 6
 7
 8
 9
10
11
12
| <!DOCTYPE html>
<html>
<head>
<meta charset="utf-8" />
<meta name="viewport" content="width=device-width, initial-scale=1.0" />
<title>Content Manager</title>
</head>
<body>
<!-- Include the script that builds the page and powers Netlify CMS -->
<script src="https://unpkg.com/netlify-cms@^2.10.187/dist/netlify-cms.js"></script>
</body>
</html>
|
admin/config.yml
 1
 2
 3
 4
 5
 6
 7
 8
 9
10
11
12
13
14
15
16
17
18
19
| backend:
name: github
repo: you/you.github.io
branch: master
site_domain: octopus-cat-123456.netlify.com
media_folder: "images/uploads"
collections:
- name: "blog" # Used in routes, e.g., /admin/collections/blog
label: "Blog" # Used in the UI
folder: "_posts/" # The path to the folder where the documents are stored
create: true # Allow users to create new documents in this collection
slug: "{{year}}-{{month}}-{{day}}-{{slug}}" # Filename template, e.g., YYYY-MM-DD-title.md
fields: # The fields for each document, usually in front matter
- { label: "Title", name: "title", widget: "string" }
- { label: "Publish Date", name: "date", widget: "datetime" }
- { label: "Tags", name: "tags", widget: "list" }
- { label: "Body", name: "body", widget: "markdown" }
|
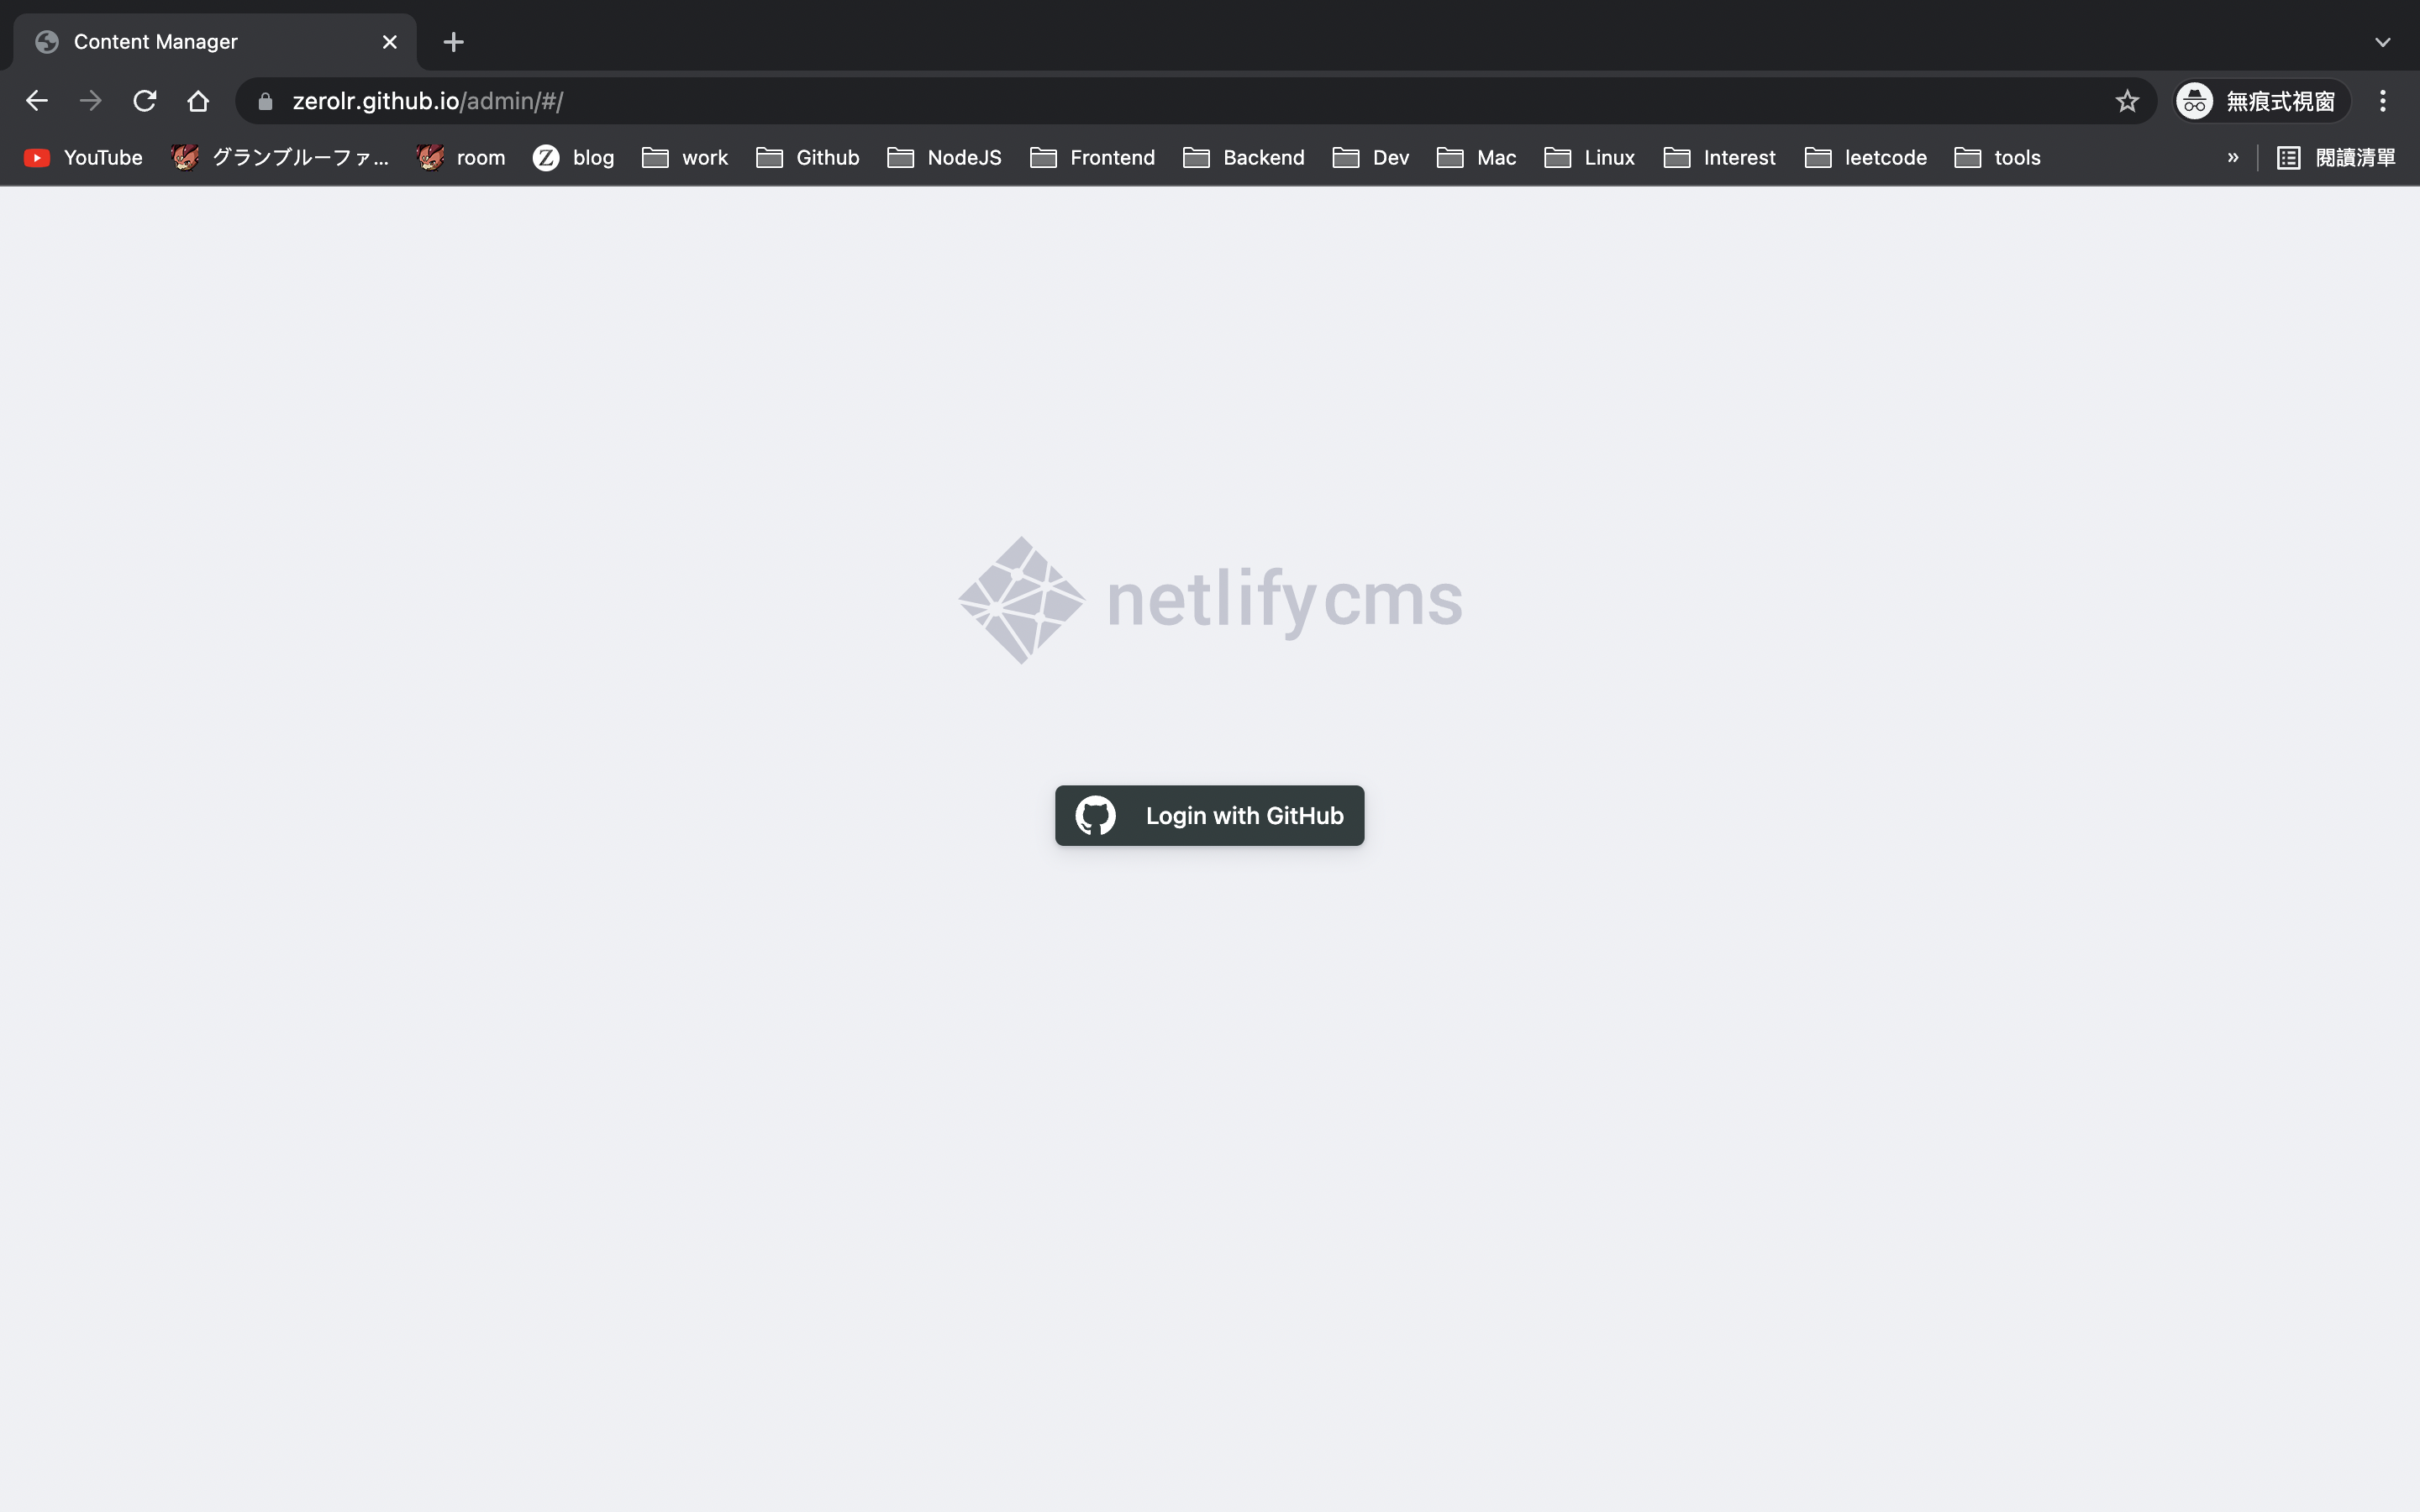
推送上去 GitHub 後,就可開啟 https://you.github.io/admin 進入 CMS 管理系統囉!
補充
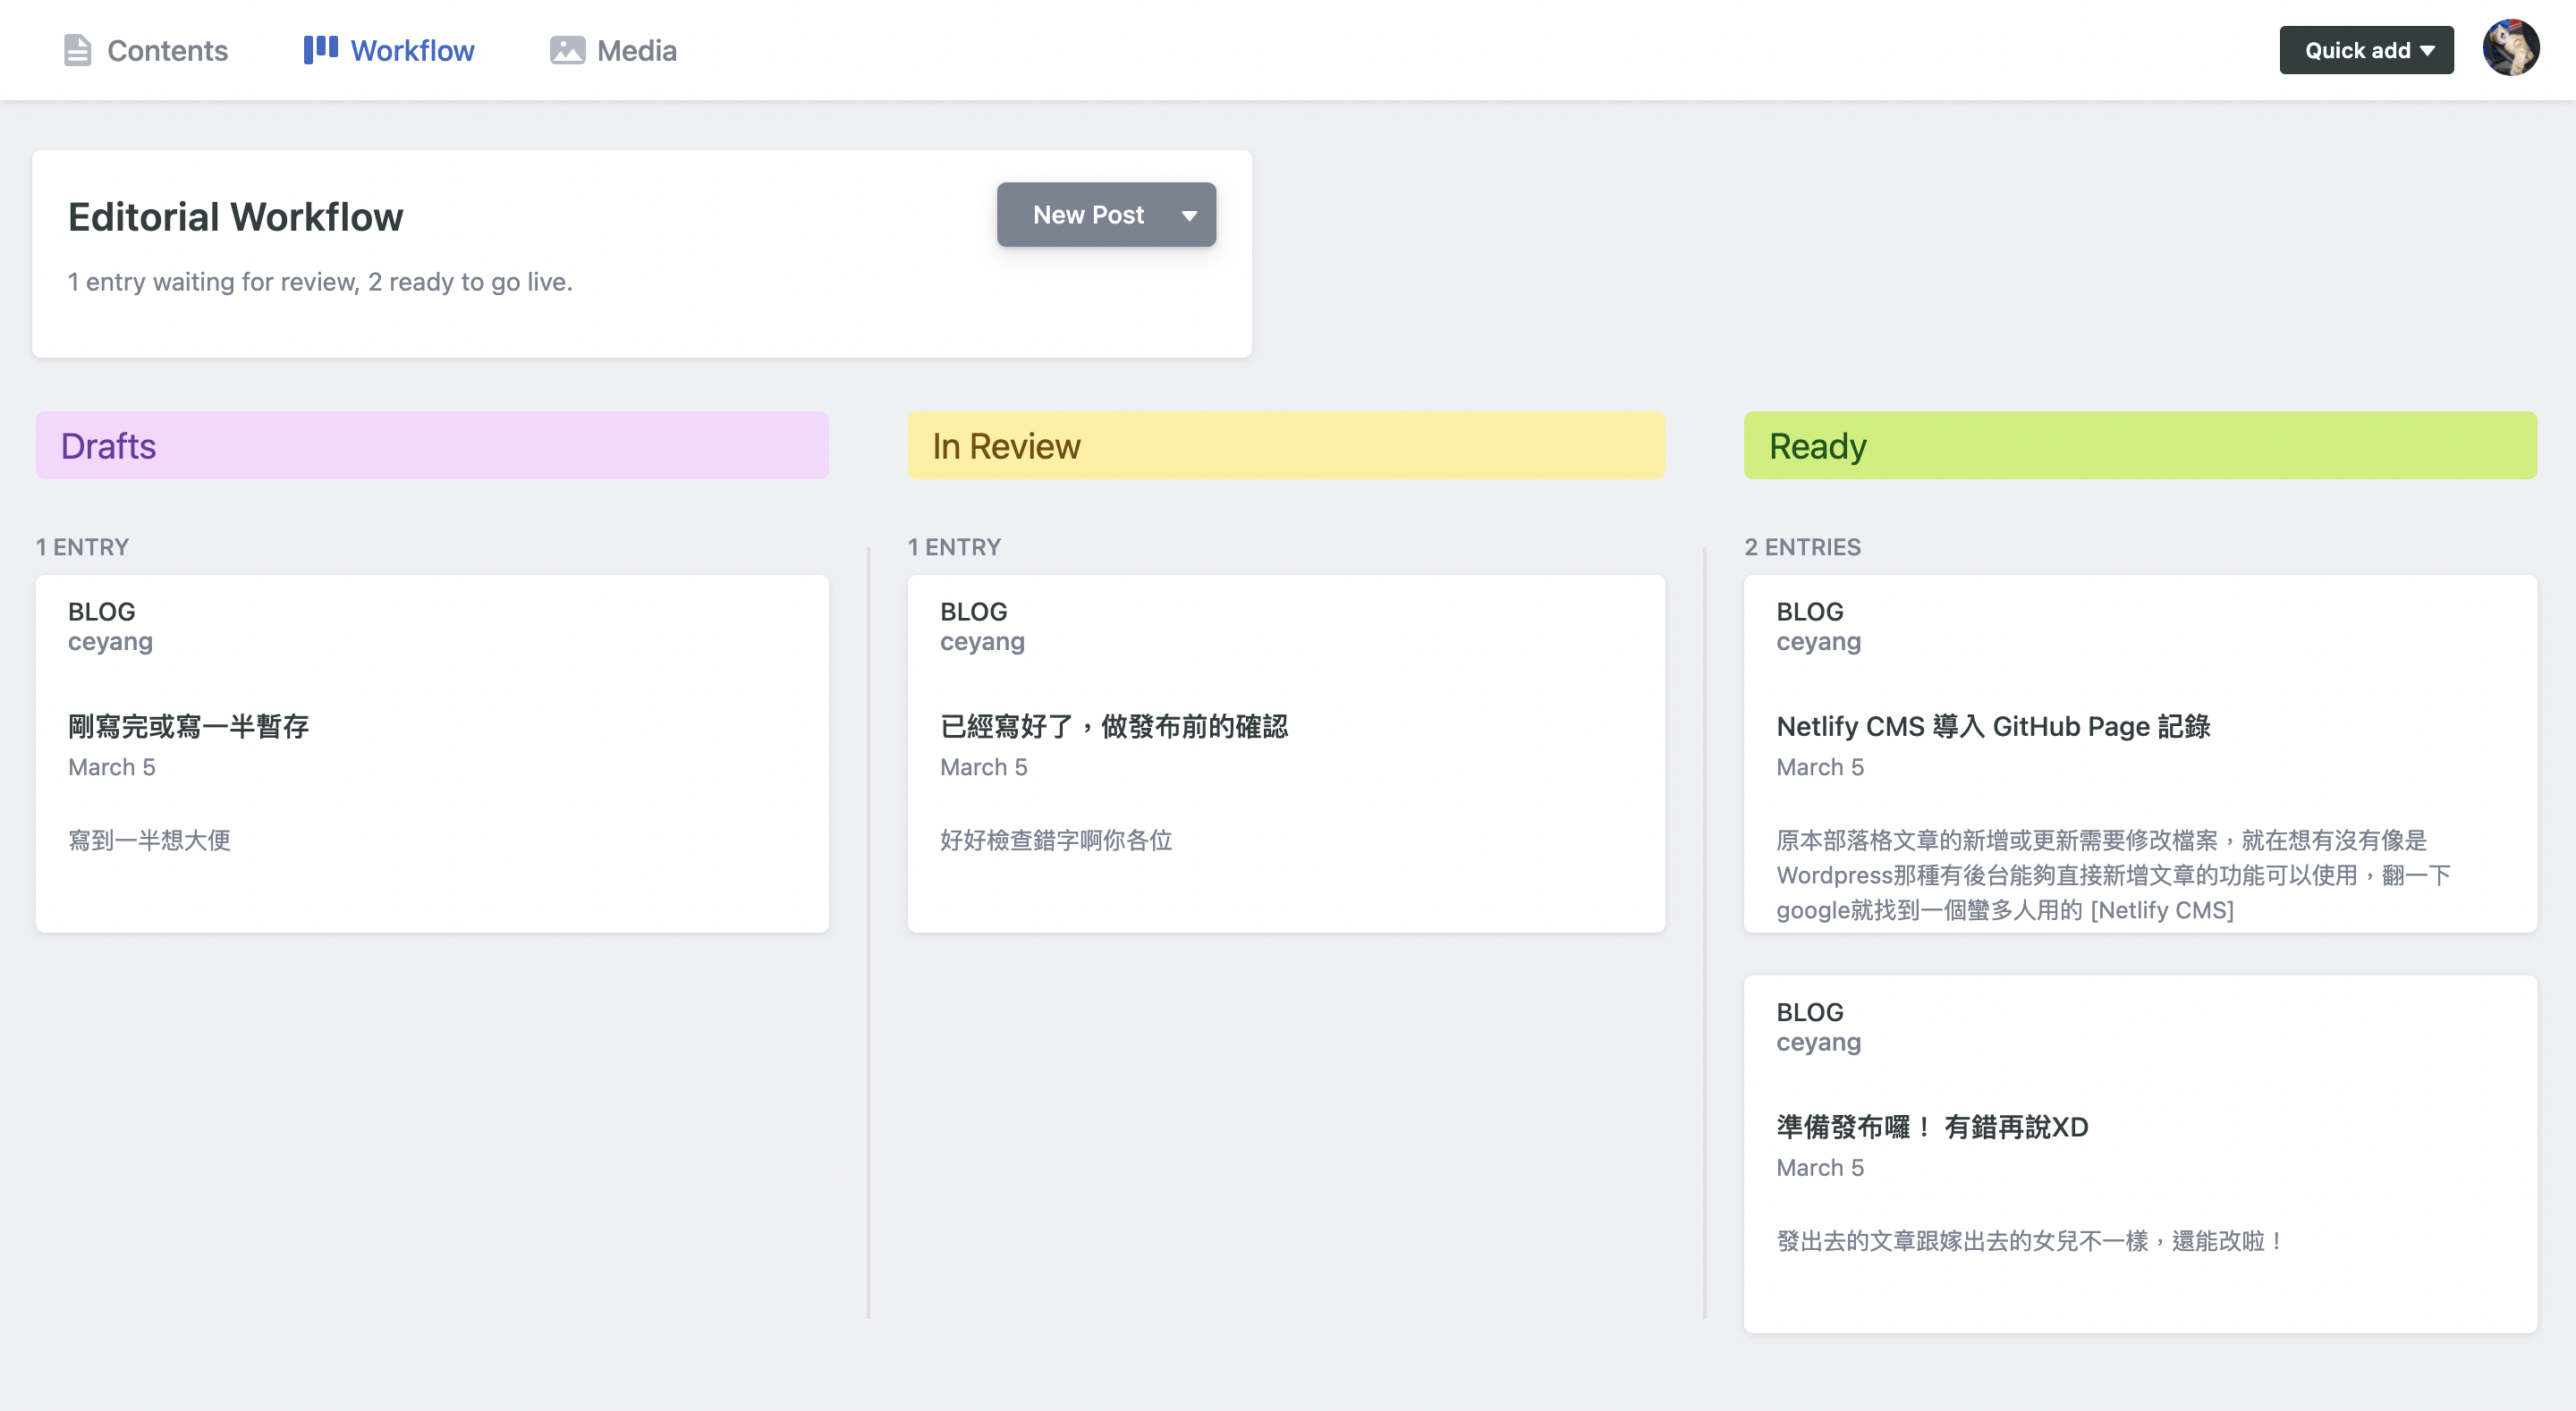
如果想要暫時保存新文章或修改,可以在 config.yml 加上下方的參數 ,就可以開啟暫存相關功能了,還分成 Draft, In review, Ready 三種階段來管理各個文章進度喔!
1
| publish_mode: editorial_workflow
|
總結
實際用過後有些點需要注意,預設文章連結會用 titile 作為 path,若超過 50 個字就會報錯(忘記哪邊的限制),文字在 url 中會被轉換為 base64 格式,很容易就會超過上限,另一個問題是用 CMS 發布文章後,bot 會幫你 merge 新的 post 到 repo 中,若想修改檔案記得要先 git pull 同步。
參考資料
- Just 3 Steps: Adding Netlify CMS to Existing GitHub Pages Site Within 10 Minutes
- NetlifyCMS - Overview
- NetlifyCMS - Publish Mode
- What is “User authorization callback URL” for?
- Authorizing OAuth Apps - GitHub Docs


