Blog 搬家完後,需要重新配置 Netlify CMS 所需的檔案才能啟用,之前的 Blog 是用 Jekyll 生成的,與現在 Hugo 參數配置的部分相似,不過 Hugo 的檔案結構與 Jekyll 還是有些許不同,這篇會記錄我調整了哪些參數,建立新分支導入 CMS 功能部署測試,最後透過 CMS 建立文章後的 markdown 會長什麼樣子。
2022-09-06 Debug: 文章中使用 cms 這個名稱作為測試功能分支,會導致 Netlify CMS 在更新 repo 時出錯,請使用 cms 以外的名稱,詳細參考:https://github.com/netlify/netlify-cms/issues/3065
Netlify 網站建立
使用此功能前需至 Netlify 建立一個網站,參考我之前的文章 Netlify CMS 導入 GitHub Pages 記錄 。
Config 配置比較
更詳細的配置可以參考 Configuration Options
之前在 Jekyll 上使用的 config 如下:
 1
 2
 3
 4
 5
 6
 7
 8
 9
10
11
12
13
14
15
16
17
18
19
20
21
| backend:
name: github
repo: zerolr/zerolr.github.io
branch: main
site_domain: musing-swanson-deda90.netlify.com
publish_mode: editorial_workflow
media_folder: "images/uploads"
collections:
- name: "blog" # Used in routes, e.g., /admin/collections/blog
label: "Blog" # Used in the UI
folder: "_posts/" # The path to the folder where the documents are stored
create: true # Allow users to create new documents in this collection
slug: "{{year}}-{{month}}-{{day}}-{{slug}}" # Filename template, e.g., YYYY-MM-DD-title.md
fields: # The fields for each document, usually in front matter
- { label: "Title", name: "title", widget: "string" }
- { label: "Publish Date", name: "date", widget: "datetime" }
- { label: "Categories", name: "categories", widget: "list" }
- { label: "Tags", name: "tags", widget: "list" }
- { label: "Body", name: "body", widget: "markdown" }
|
現在 Hugo 上使用的 config 如下:
 1
 2
 3
 4
 5
 6
 7
 8
 9
10
11
12
13
14
15
16
17
18
19
20
21
22
23
24
25
26
27
28
29
30
31
32
33
34
35
36
37
| backend:
name: github
repo: zerolr/zerolr.github.io
branch: master # Branch to update (optional; defaults to master)
site_domain: musing-swanson-deda90.netlify.com
media_folder: static/assets/images
public_folder: assets/images
publish_mode: editorial_workflow
collections:
- name: "blog"
label: "Blog"
folder: "content/post"
create: true
slug: "{{year}}-{{month}}-{{day}}-{{slug}}"
editor:
preview: false
fields:
- { label: "Title", name: "title", widget: "string" }
- { label: "Slug", name: "slug", widget: "string" }
- { label: "Description", name: "description", widget: "string" }
- { label: "Cover", name: "image", widget: "string" }
- {
label: "Categories",
name: "categories",
widget: "list",
summary: "{{fields.category}}",
field: { label: "Category", name: "category", widget: "string" },
}
- {
label: "Tags",
name: "tags",
widget: "list",
summary: "{{fields.tag}}",
field: { label: "Tag", name: "tag", widget: "string" },
}
- { label: "Publish Date", name: "date", widget: "datetime" }
- { label: "Body", name: "body", widget: "markdown" }
|
主要的配置簡介
repo: blog 的 repo 名稱
branch: 透過 CMS 修改的部分會更新至這個分支中
site_domain: 填入在 Netlify 上建立網站的 domain
media_folder: 在 CMS 中上傳的圖片存放資料夾路徑
public_folder: 部署後文章存取資源的資料夾路徑
publish_mode: 文章的發布模式,有分一般及暫存模式
collections: 可以定義多種文章配置,例:tech-artcle, life-article
- name: 文章的類型名稱
- label: 文章配置名稱,僅影響顯示文字
- folder: 文章資料夾路徑
- create: 新增文章功能
- slug: 自動產生的文章檔案名稱,例:2022-09-04-new-post
- editor(preview): 預覽文章功能
- fields: 依據底下的配置在檔案中產生對應的欄位
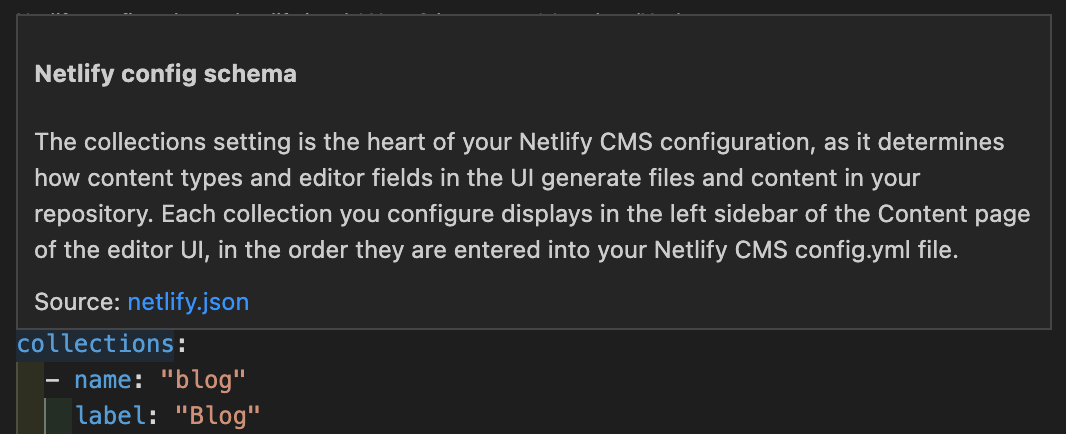
若是使用 VSCode 編輯,可以將滑鼠移至參數上,會顯示詳細說明
我主要改了什麼?
- media_folder: Hugo 在 build 後會將 static 中的檔案放在 root 下, 而 CMS 上傳的圖片會存在這個路徑,如此 build 後的資源才可被網頁存取
- public_folder: 承上,文章從此路徑存取圖片
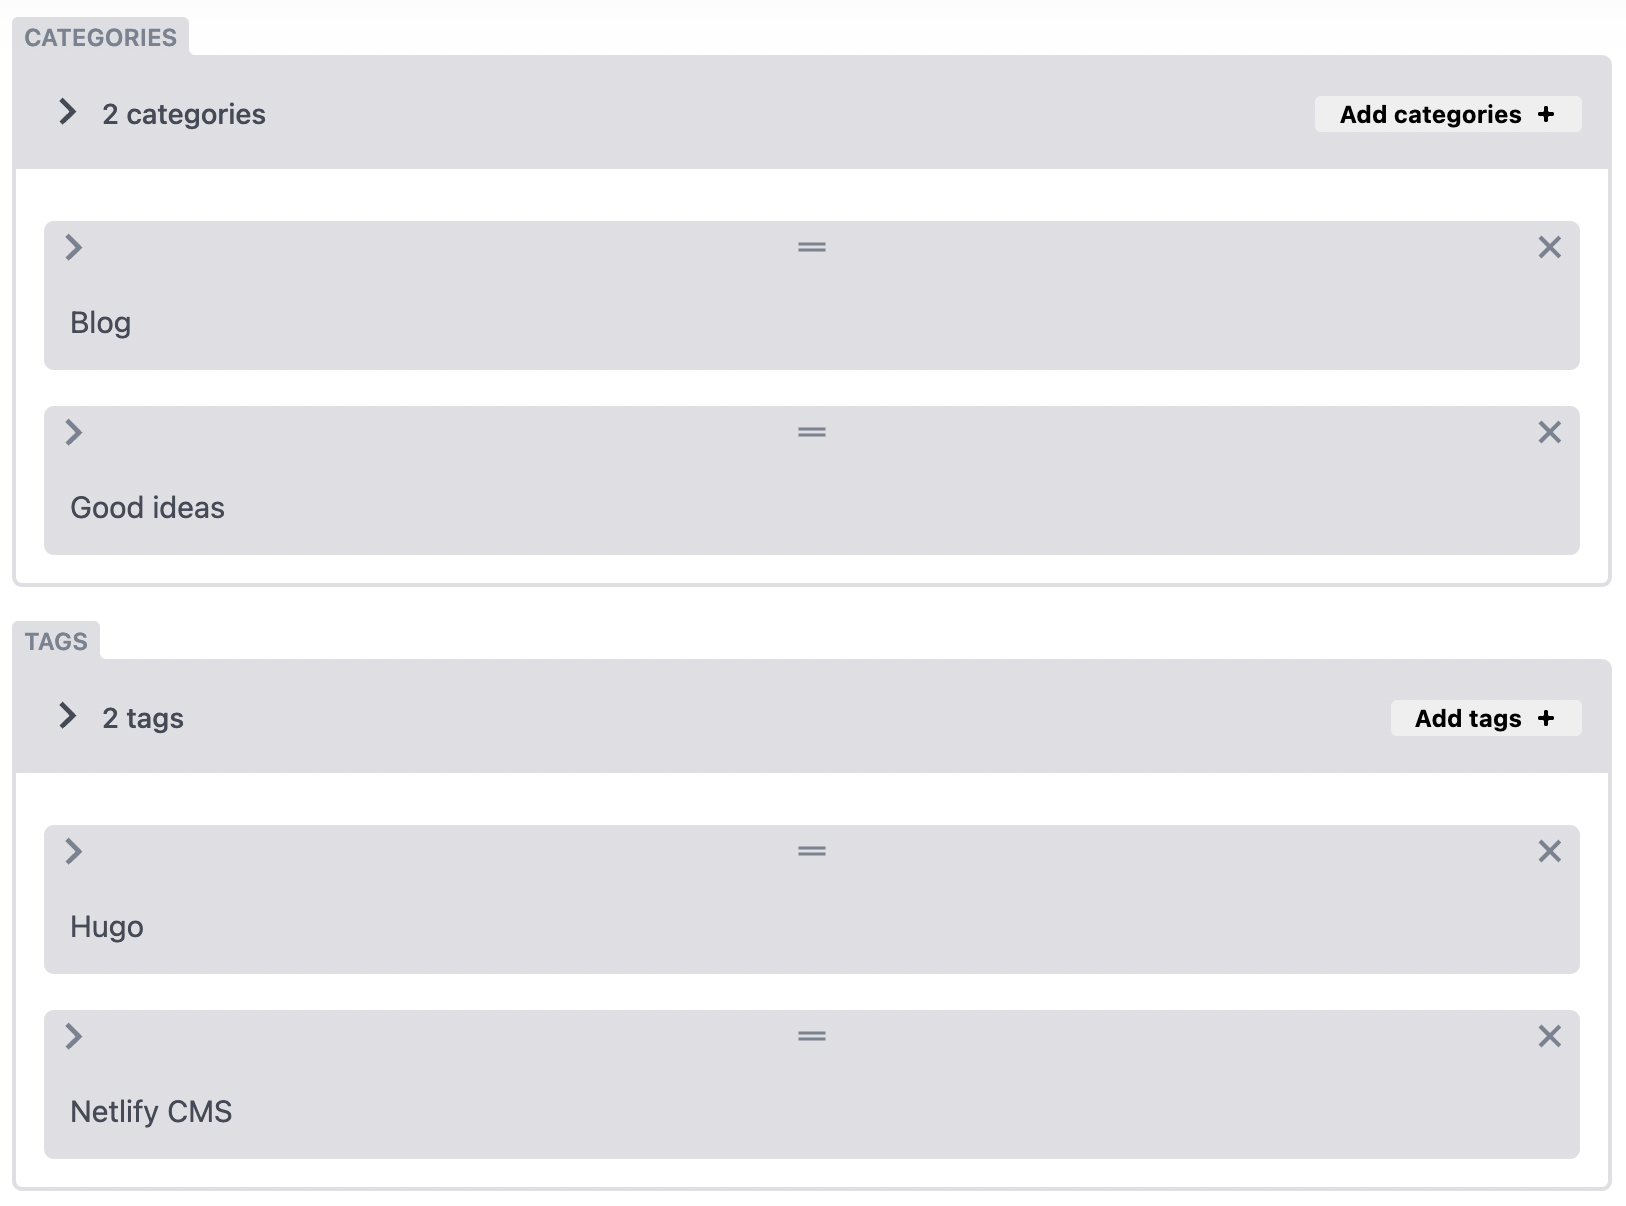
- fields: 原本照之前的配置時,會有 Tags 與 Categories 只能輸入一個字串的問題,且字串中不能有空格,後來在這篇 issue中找到方法處理,利用 summary 來組合不同參數,結果如下圖
建立新分支加入 Netlify CMS 部署測試
在加入 Netlify CMS 的檔案前,先分別建立給 master 及 cms 分支使用的 workflows。
觀察模板提供的 deploy.yml
這段表示當 repo 被 push 或 pull_request 到 master 分支時,會執行這個 yml 檔的部署工作。
1
2
3
4
5
| on:
push:
branches: [master]
pull_request:
branches: [master]
|
中間還有安裝套件、暫存資源、建置靜態檔案等等流程,直接拉到最下面 Deploy 的地方,這邊表示部署 gh-pages 中的檔案。
1
2
3
4
5
6
7
| - name: Deploy 🚀
uses: JamesIves/github-pages-deploy-action@4.1.4
with:
branch: gh-pages
folder: public
clean: true
single-commit: true
|
建立給新分支部署用的 deploy.yml
將原本的 deploy.yml 改為 deploy_master.yml,,並建立一個 deploy_cms.yml,修改觸發部署的分支為 cms,以及部署分支改為 gh-pages-feature-test。
 1
 2
 3
 4
 5
 6
 7
 8
 9
10
11
12
13
14
15
16
17
18
19
20
21
22
23
24
25
26
27
28
29
30
31
32
33
34
35
36
37
38
39
40
41
42
43
44
45
46
47
48
49
50
51
52
53
54
55
| # deploy_cms.yml
name: Deploy to Github Pages - Feture test
on:
push:
branches: [cms]
pull_request:
branches: [cms]
jobs:
build:
runs-on: ubuntu-latest
steps:
- uses: actions/checkout@v2
- name: Cache Hugo resources
uses: actions/cache@v2
env:
cache-name: cache-hugo-resources
with:
path: resources
key: ${{ env.cache-name }}
- uses: actions/setup-go@v2
with:
go-version: "^1.17.0"
- run: go version
- name: Cache Go Modules
uses: actions/cache@v2
with:
path: |
~/.cache/go-build
~/go/pkg/mod
key: ${{ runner.os }}-go-${{ hashFiles('**/go.sum') }}
restore-keys: |
${{ runner.os }}-go-
- name: Setup Hugo
uses: peaceiris/actions-hugo@v2
with:
hugo-version: "latest"
extended: true
- name: Build
run: hugo --minify --gc
- name: Deploy 🚀
uses: JamesIves/github-pages-deploy-action@4.1.4
with:
branch: gh-pages-feature-test
folder: public
clean: true
single-commit: true
|
修改完後在 master 分支加入紀錄。
1
2
| git add .
git commit -m "feat: update workflow for master branch, add new workflow for cms branch"
|
此時這個版本的紀錄會留在已建立好 master 與 cms 分支用的 workflows 上,下一步再將 Netlify CMS 所需的檔案加入。
建立 cms 分支並將 Netlify CMS 檔案加入
首先建立並切換至 cms 分支。
將 Netlify CMS 所需的檔案放在 static 目錄底下,後面 build 後才能讓 admin 輸出在根目錄中。
1
| root - static - admin - config.yml - index.html
|
建立 commit 記錄本次修改。
1
2
| git add .
git commit -m "feat: add netlify cms"
|
此時 cms 分支會領先 master 分支一個 commit,可以參考下面的補充,接下來要準備部署上去。
補充: git branch 分支建立
點擊展開
這邊用範例來解釋分支,新開資料夾加入一個 blog.txt 檔案,並建立 git 環境加入 commit。
1
2
3
4
5
6
| mkdir git-branch-test
cd git-branch-test
git init
echo "This is blog file" >> blog.txt
git add .
git commit -m "initial commit"
|
使用 git log 查看狀態,目前有一個 commit ,HEAD 表示目前所在的 commit,箭頭指向的位置表示 commit 所在的分支。
1
2
| git log --oneline
d5bf87b (HEAD -> master) initial commit
|
建立分支並切換過去,使用以下指令達成,加上 -b 可以新增分支同時切換過去。
檢查所在分支用 git branch 指令,*符號位置表示所在分支。
1
2
3
| git branch
master
*cms
|
加入 config.yml 檔案並建立 commit 後,使用 git log 查看狀態,由於是基於此時的 master 分支上建立分支,在 cms 分支中會有 master 分支的 commit,且比 master 分支領先一個 commit ,意思就是比 master 分支領先一筆修改紀錄。
1
2
3
4
5
6
| echo "This is config file" >> config.yml
git add .
git commit -m "feat: add config.yml"
git log --oneline
09103bc (HEAD -> cms) feat: add config.yml
d5bf87b (master) initial commit
|
我們可以切回去 master 分支查看 git log,剛才前面那個 commit 及 config.yml 不見了! 因為剛才是在 cms 分支中建立 commit ,新增 config.yml 這筆紀錄只有在 cms 的分支中才能看到,所以可以依據想加入的功能開對應的分支。
1
2
3
4
5
| git checkout master
Switched to branch 'master'
git log --oneline
d5bf87b (HEAD -> master) initial commit
|
可以把 branch 想像成是資料夾,開分支就是從 master 資料夾複製一份並重新命名成 cms,commit 就是對資料夾內的內容做編輯,以範例來說最後 master 有一份檔案,而 cms 則有兩份檔案囉!
部署測試版網站
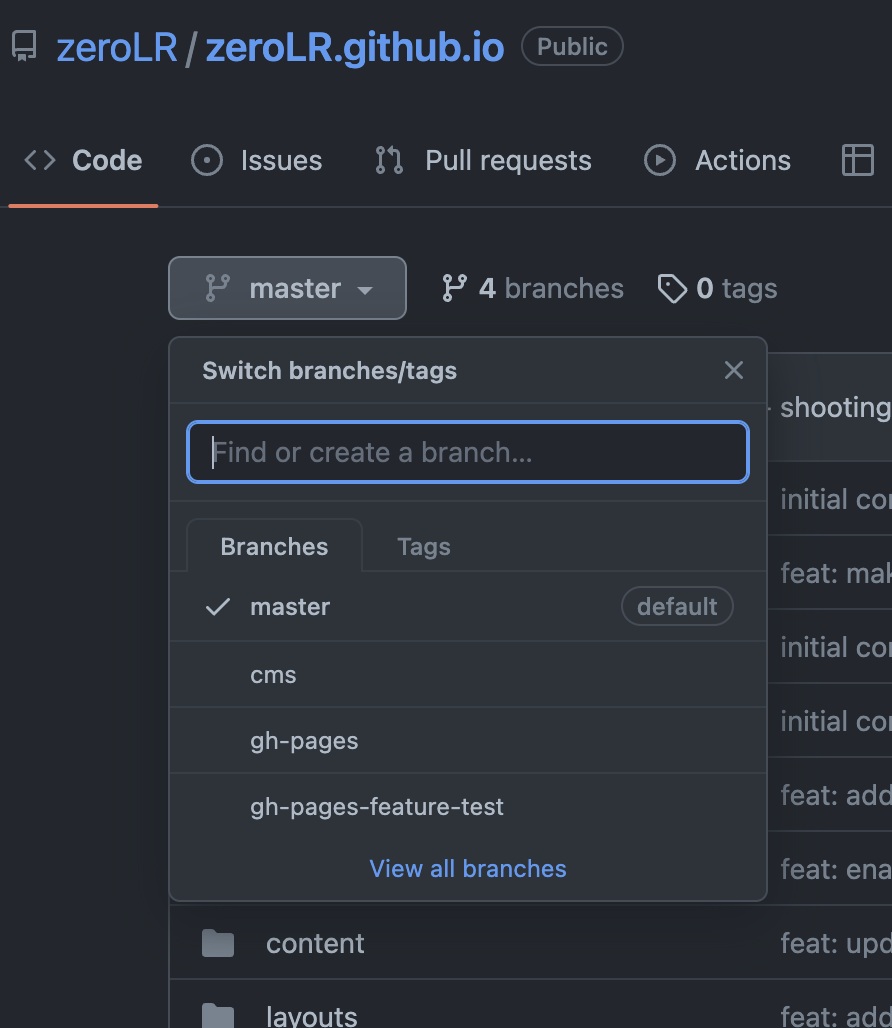
將程式 push 至 遠端 repo 的 cms 分支上,push 遠端不存在的分支時 GitHub 會幫我們建立,且因 cms 分支被 push 還會觸發 deploy_cms.yml 的 workflow。
push 完後到網頁查看 GitHub repo,左邊清單可以看到目前有的分支,可以比較 master 與 cms 中的檔案是否如預期不同。
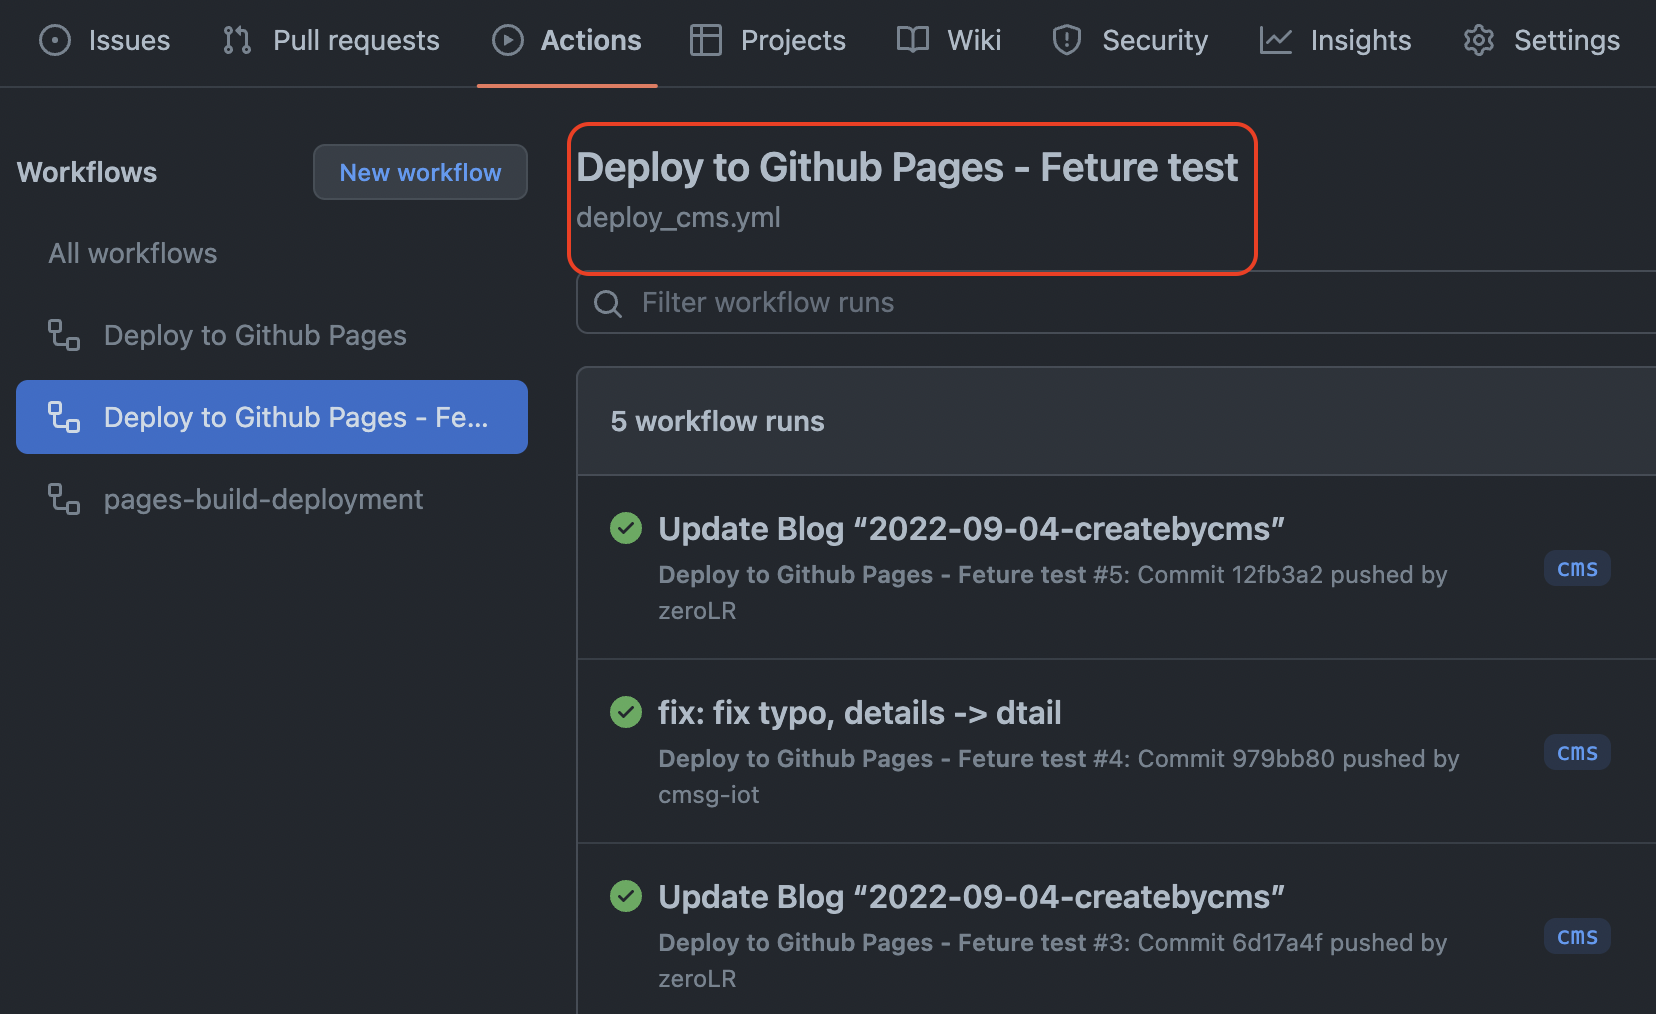
至 repo 中的 Actions 查看結果,可以看到執行工作流程的檔案及名稱,以及底下完成過的工作。
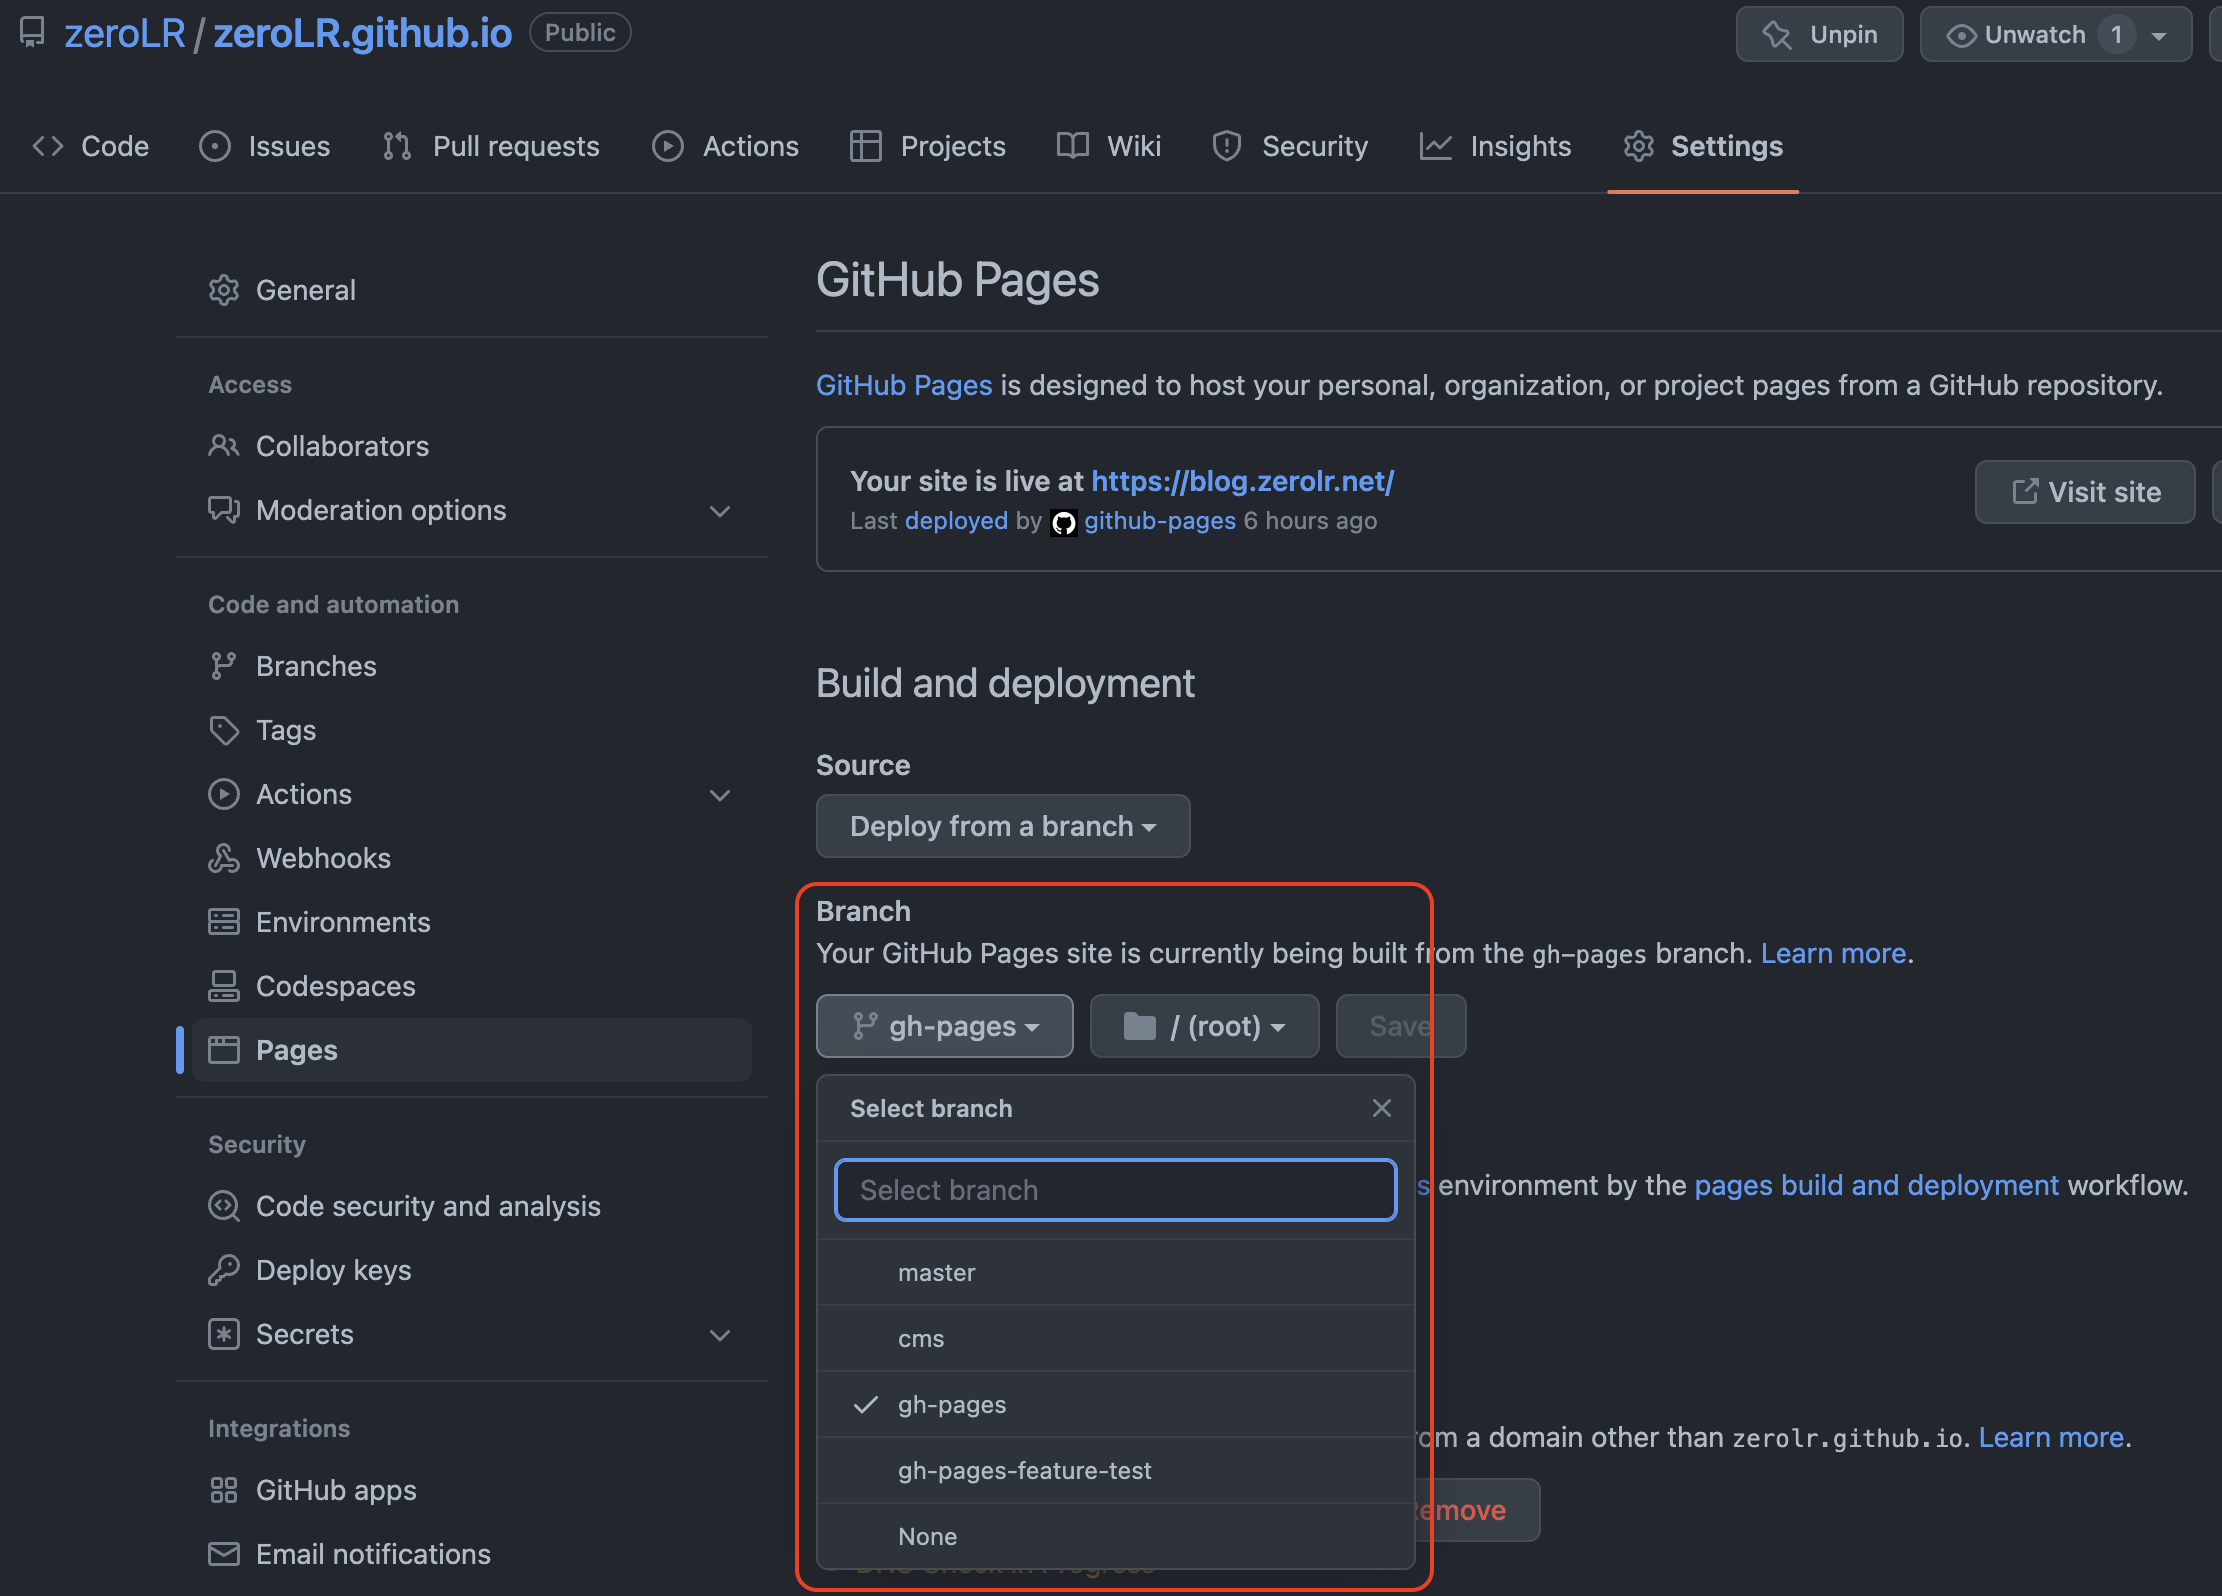
待 workflow 工作完成後,至 repo → Settings → Pages 底下,在 Branch 的欄位中選擇你要部署網站的分支,這邊選擇由 deploy_cms.yml 所產生的 gh-pages-feature-test 分支,按下 Save 後就會開始部署。
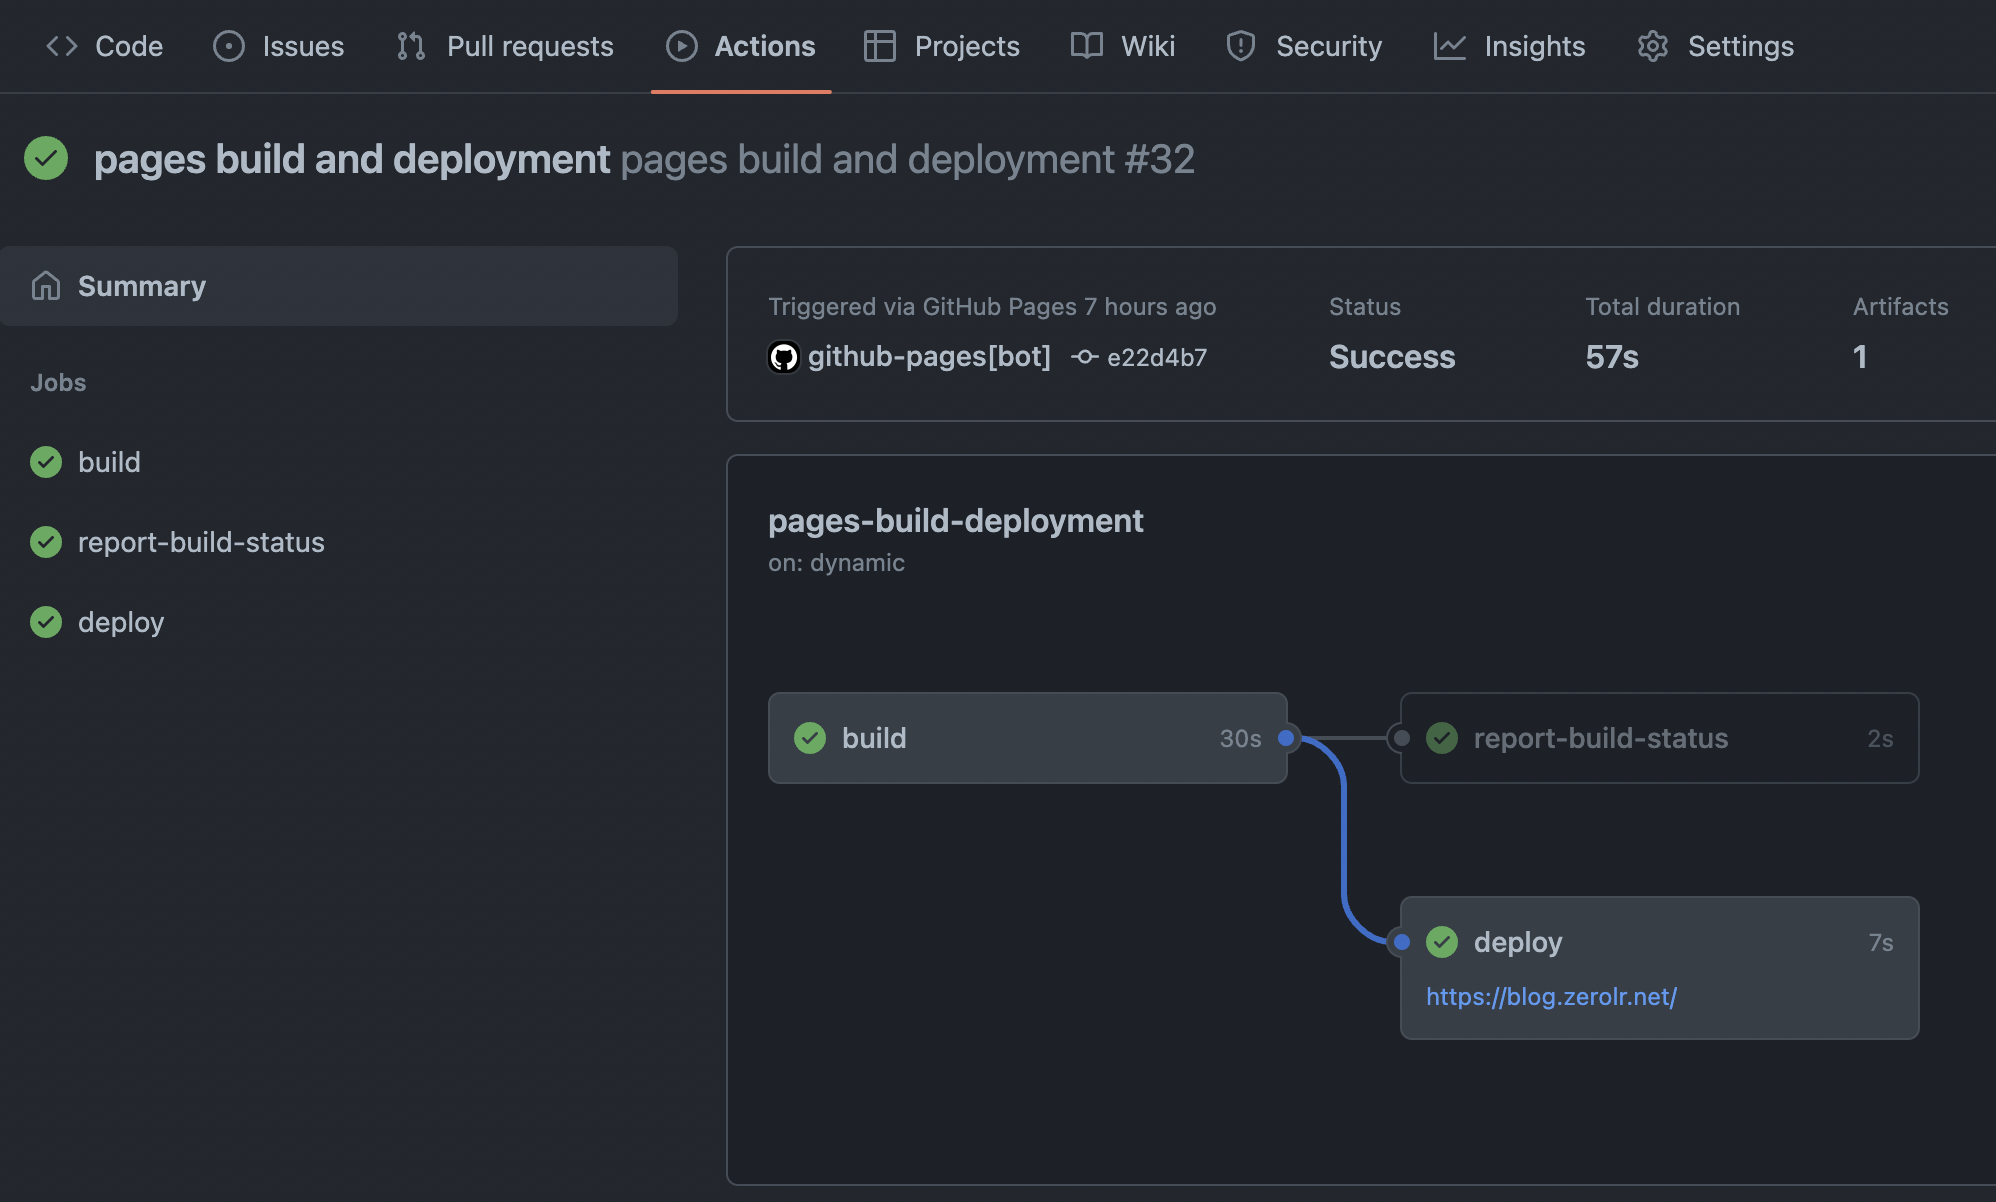
部署中的過程一樣可以在 Actions 中查看,可以點進去看更詳細的過程,失敗的錯誤訊息在這邊都可以查得到。
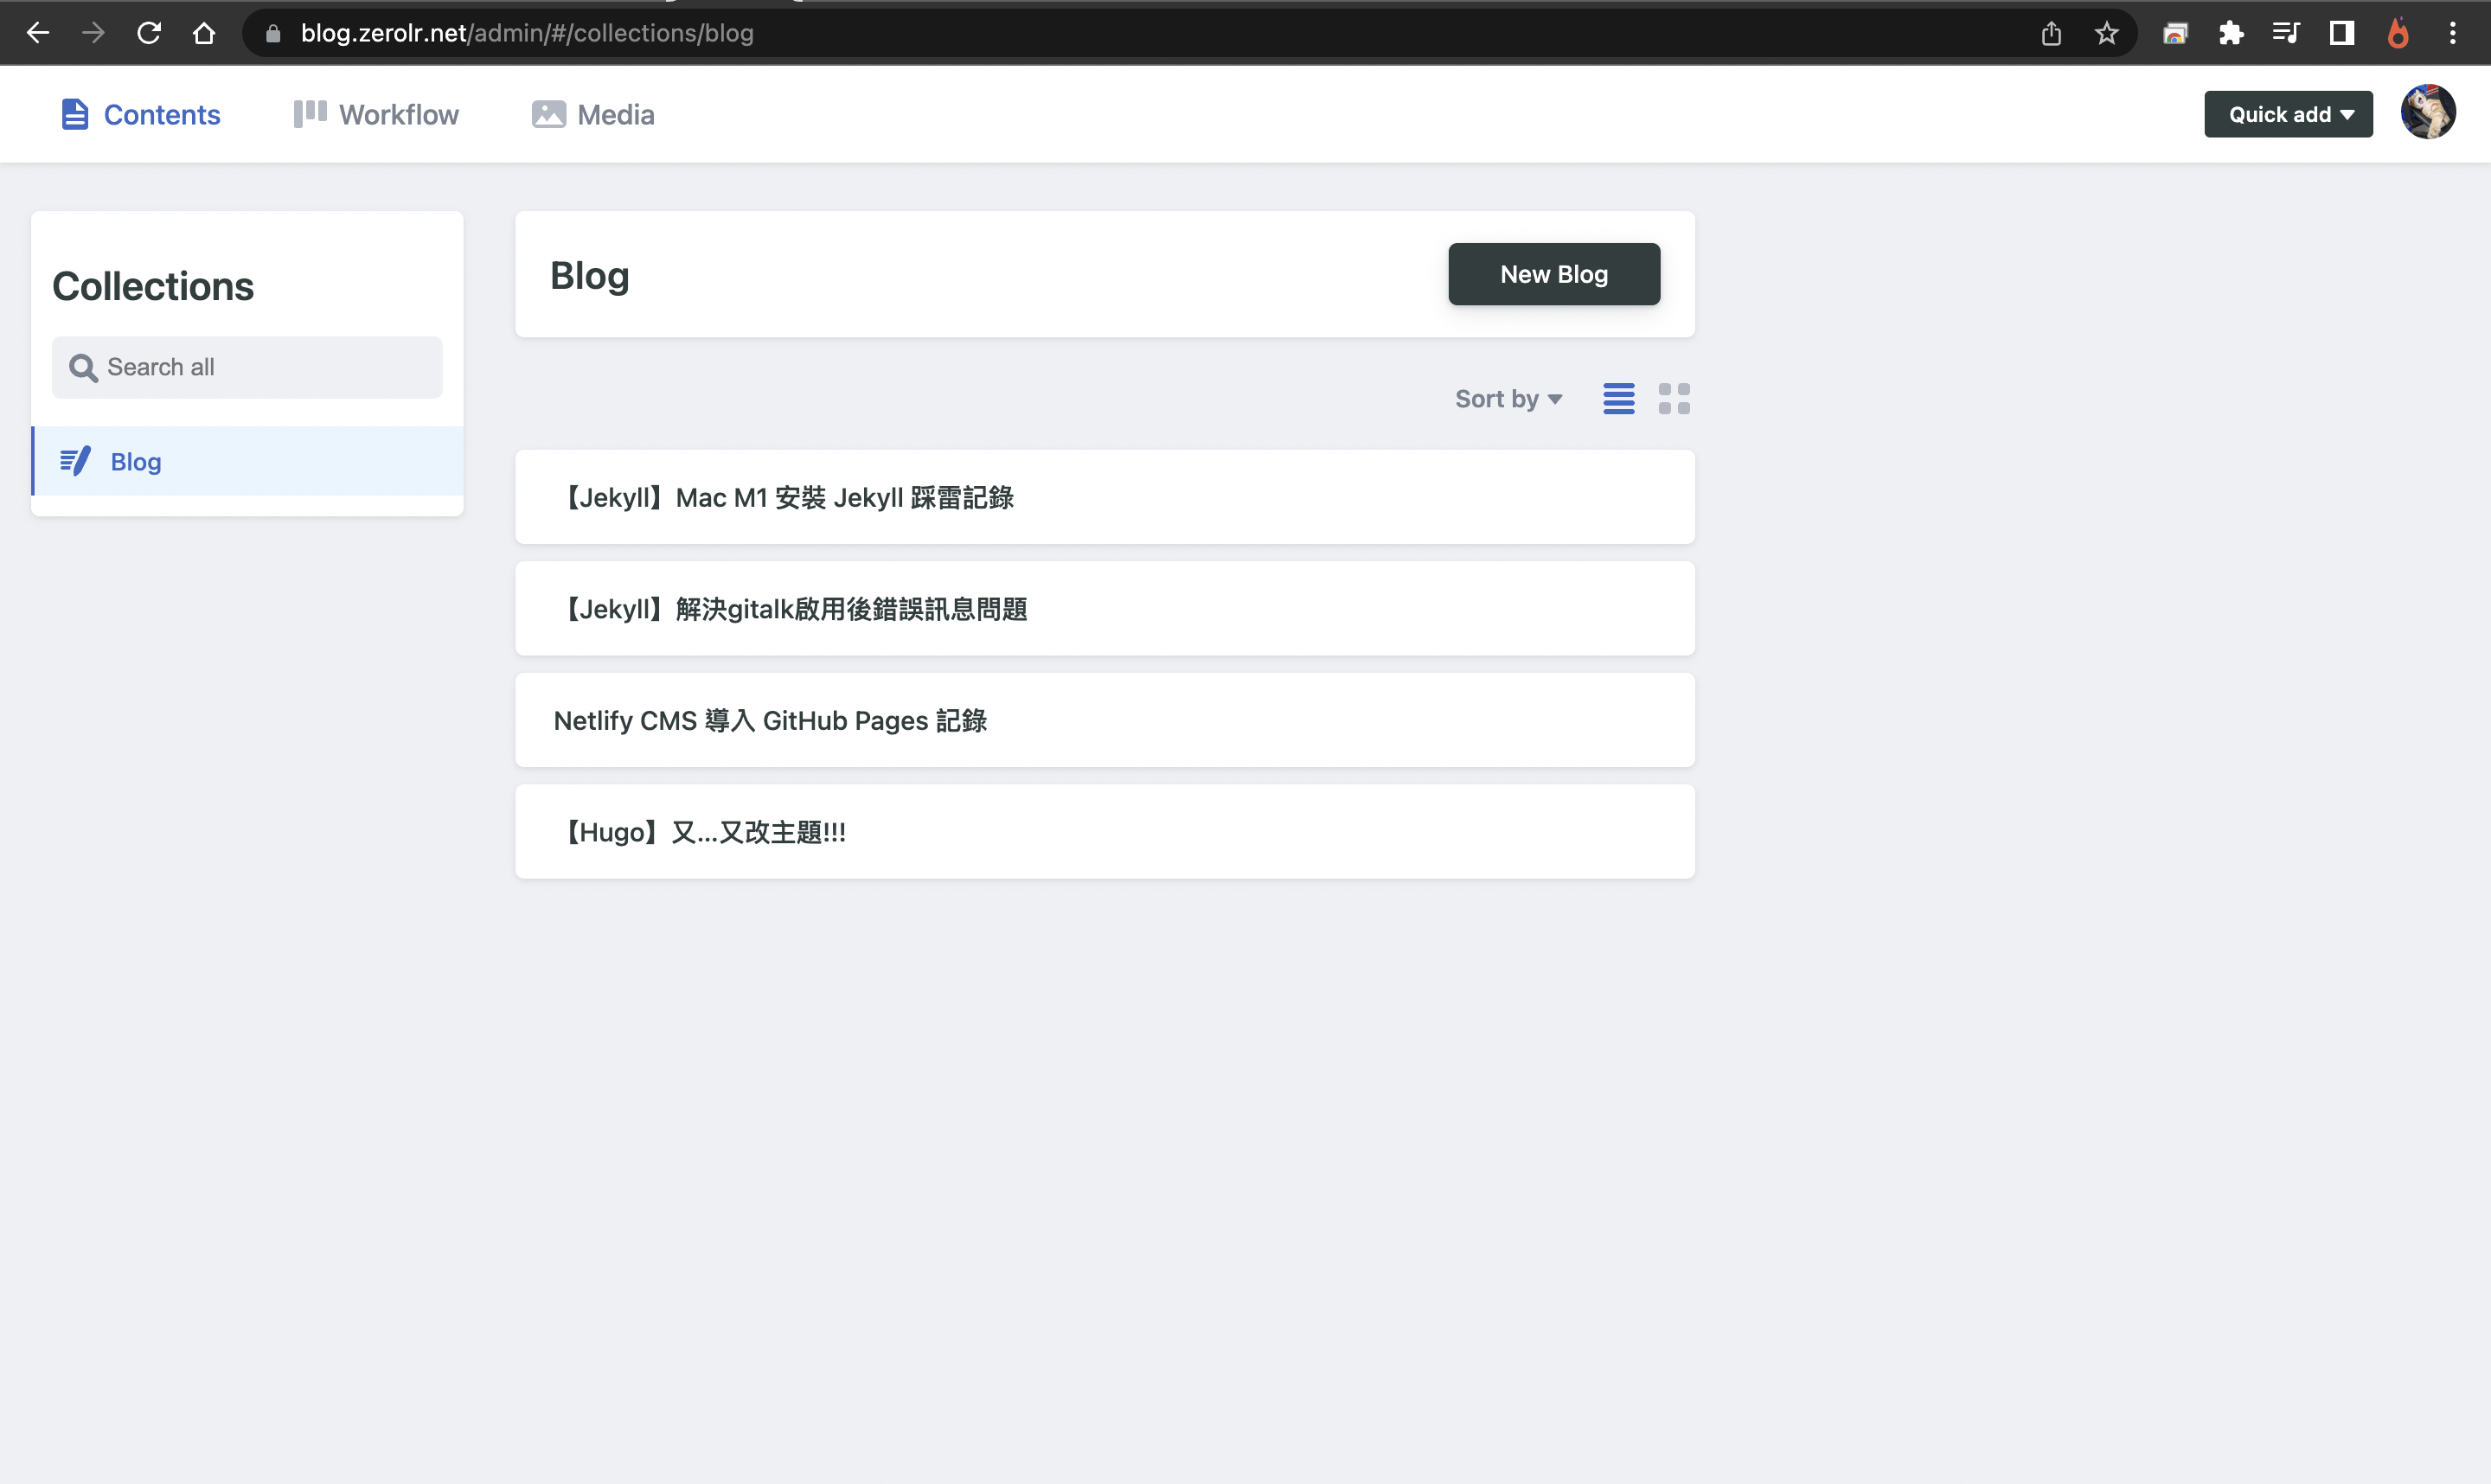
成功部署後開啟網站進入 CMS 管理畫面,登入已授權的 GitHub 帳號後就可以開始建立文章囉!
合併新功能至 master 分支
新增的功能測試完成後,就可以合併回 master 分支進行正式網站的部署,在 repo 可以看到提示你合併分支的訊息。

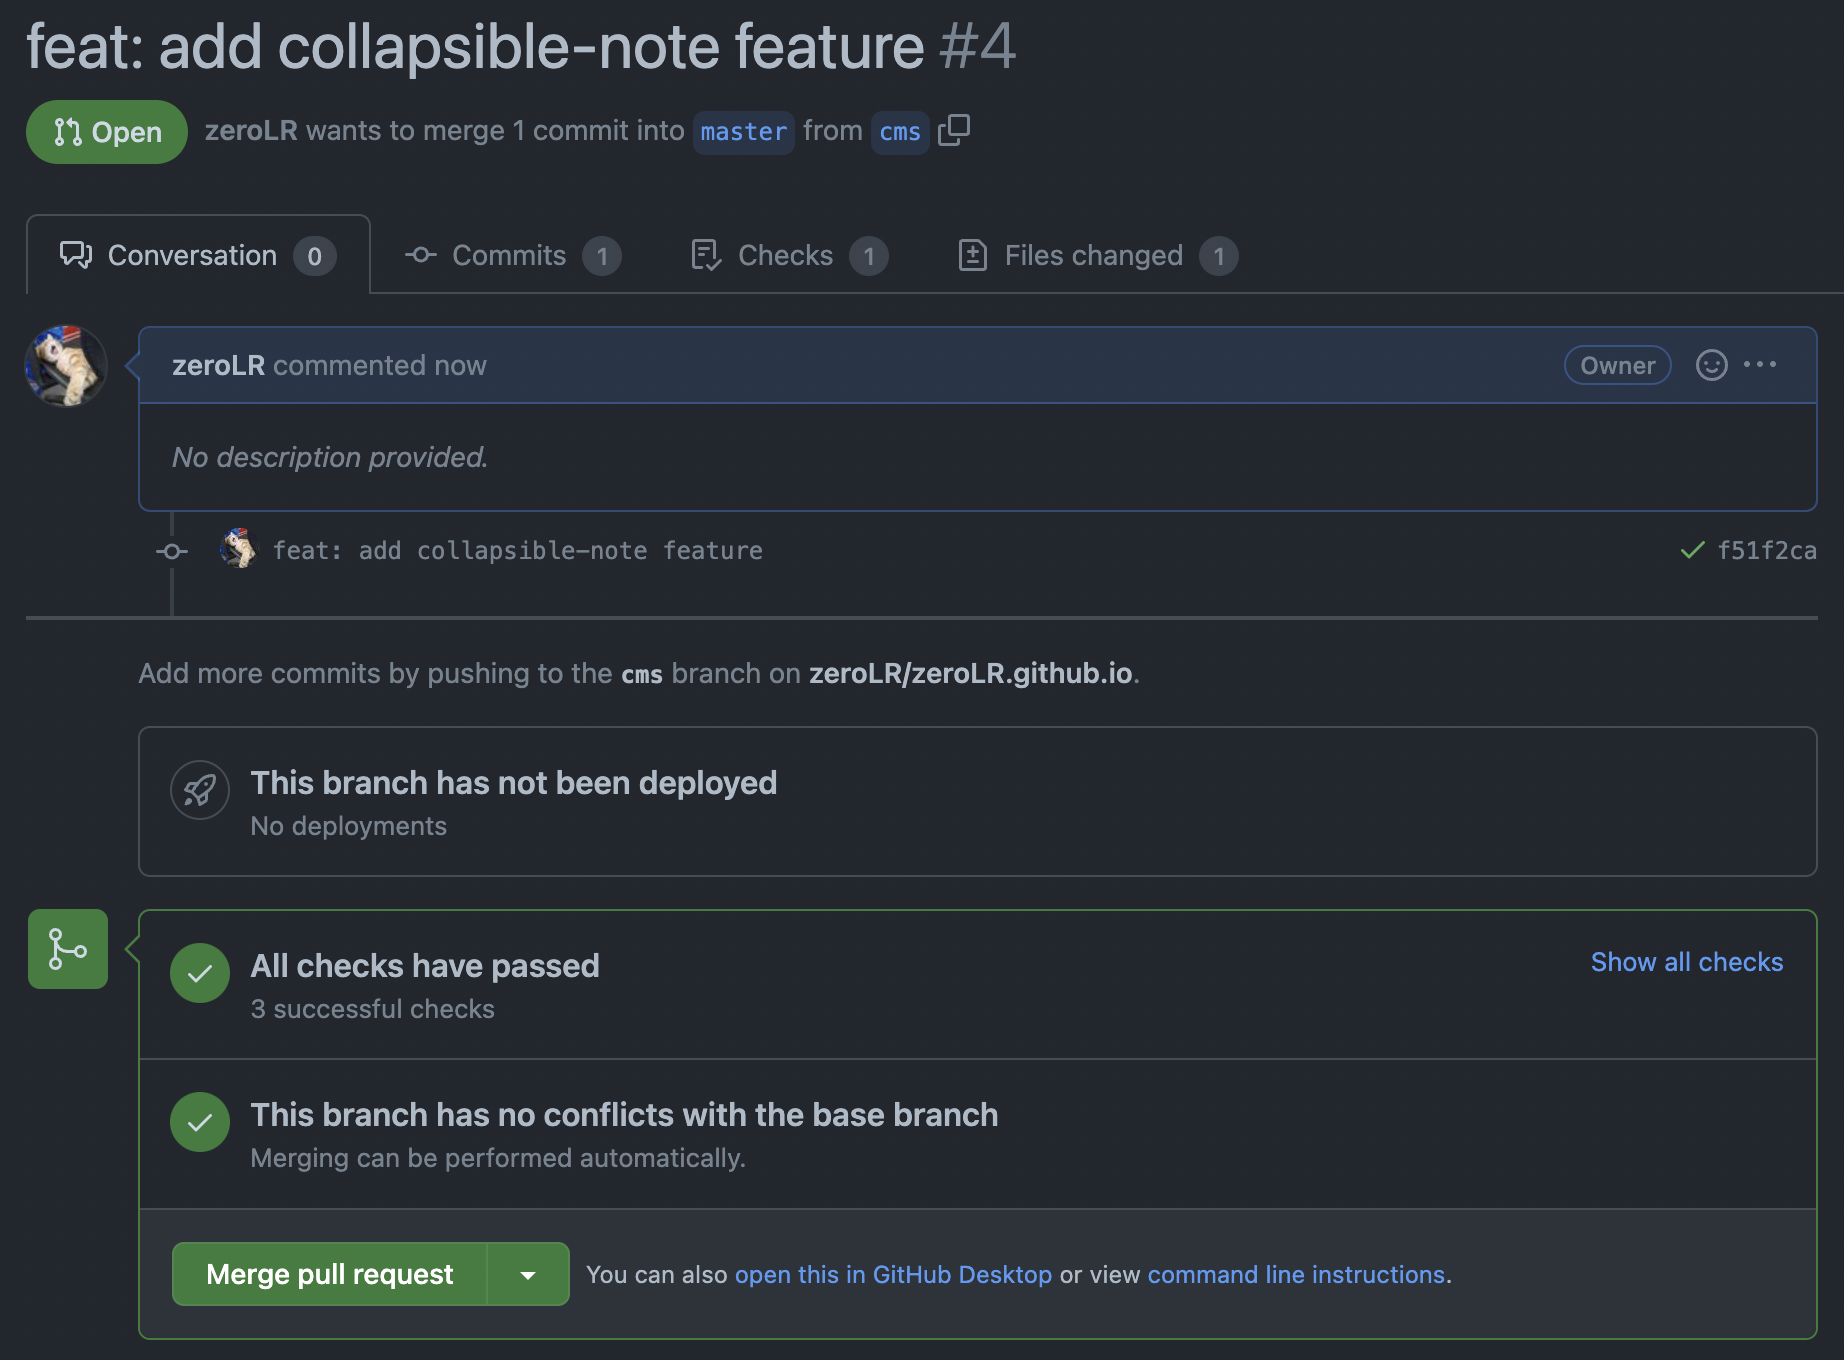
點擊 Compare & pull request ,這邊會檢查有無衝突,往下拉可以看到從 cms 分支 合併回 master 分支時的內容差異,確認都沒問題後填寫 commit 訊息,按下 Create pull request 就成功發送合併請求。
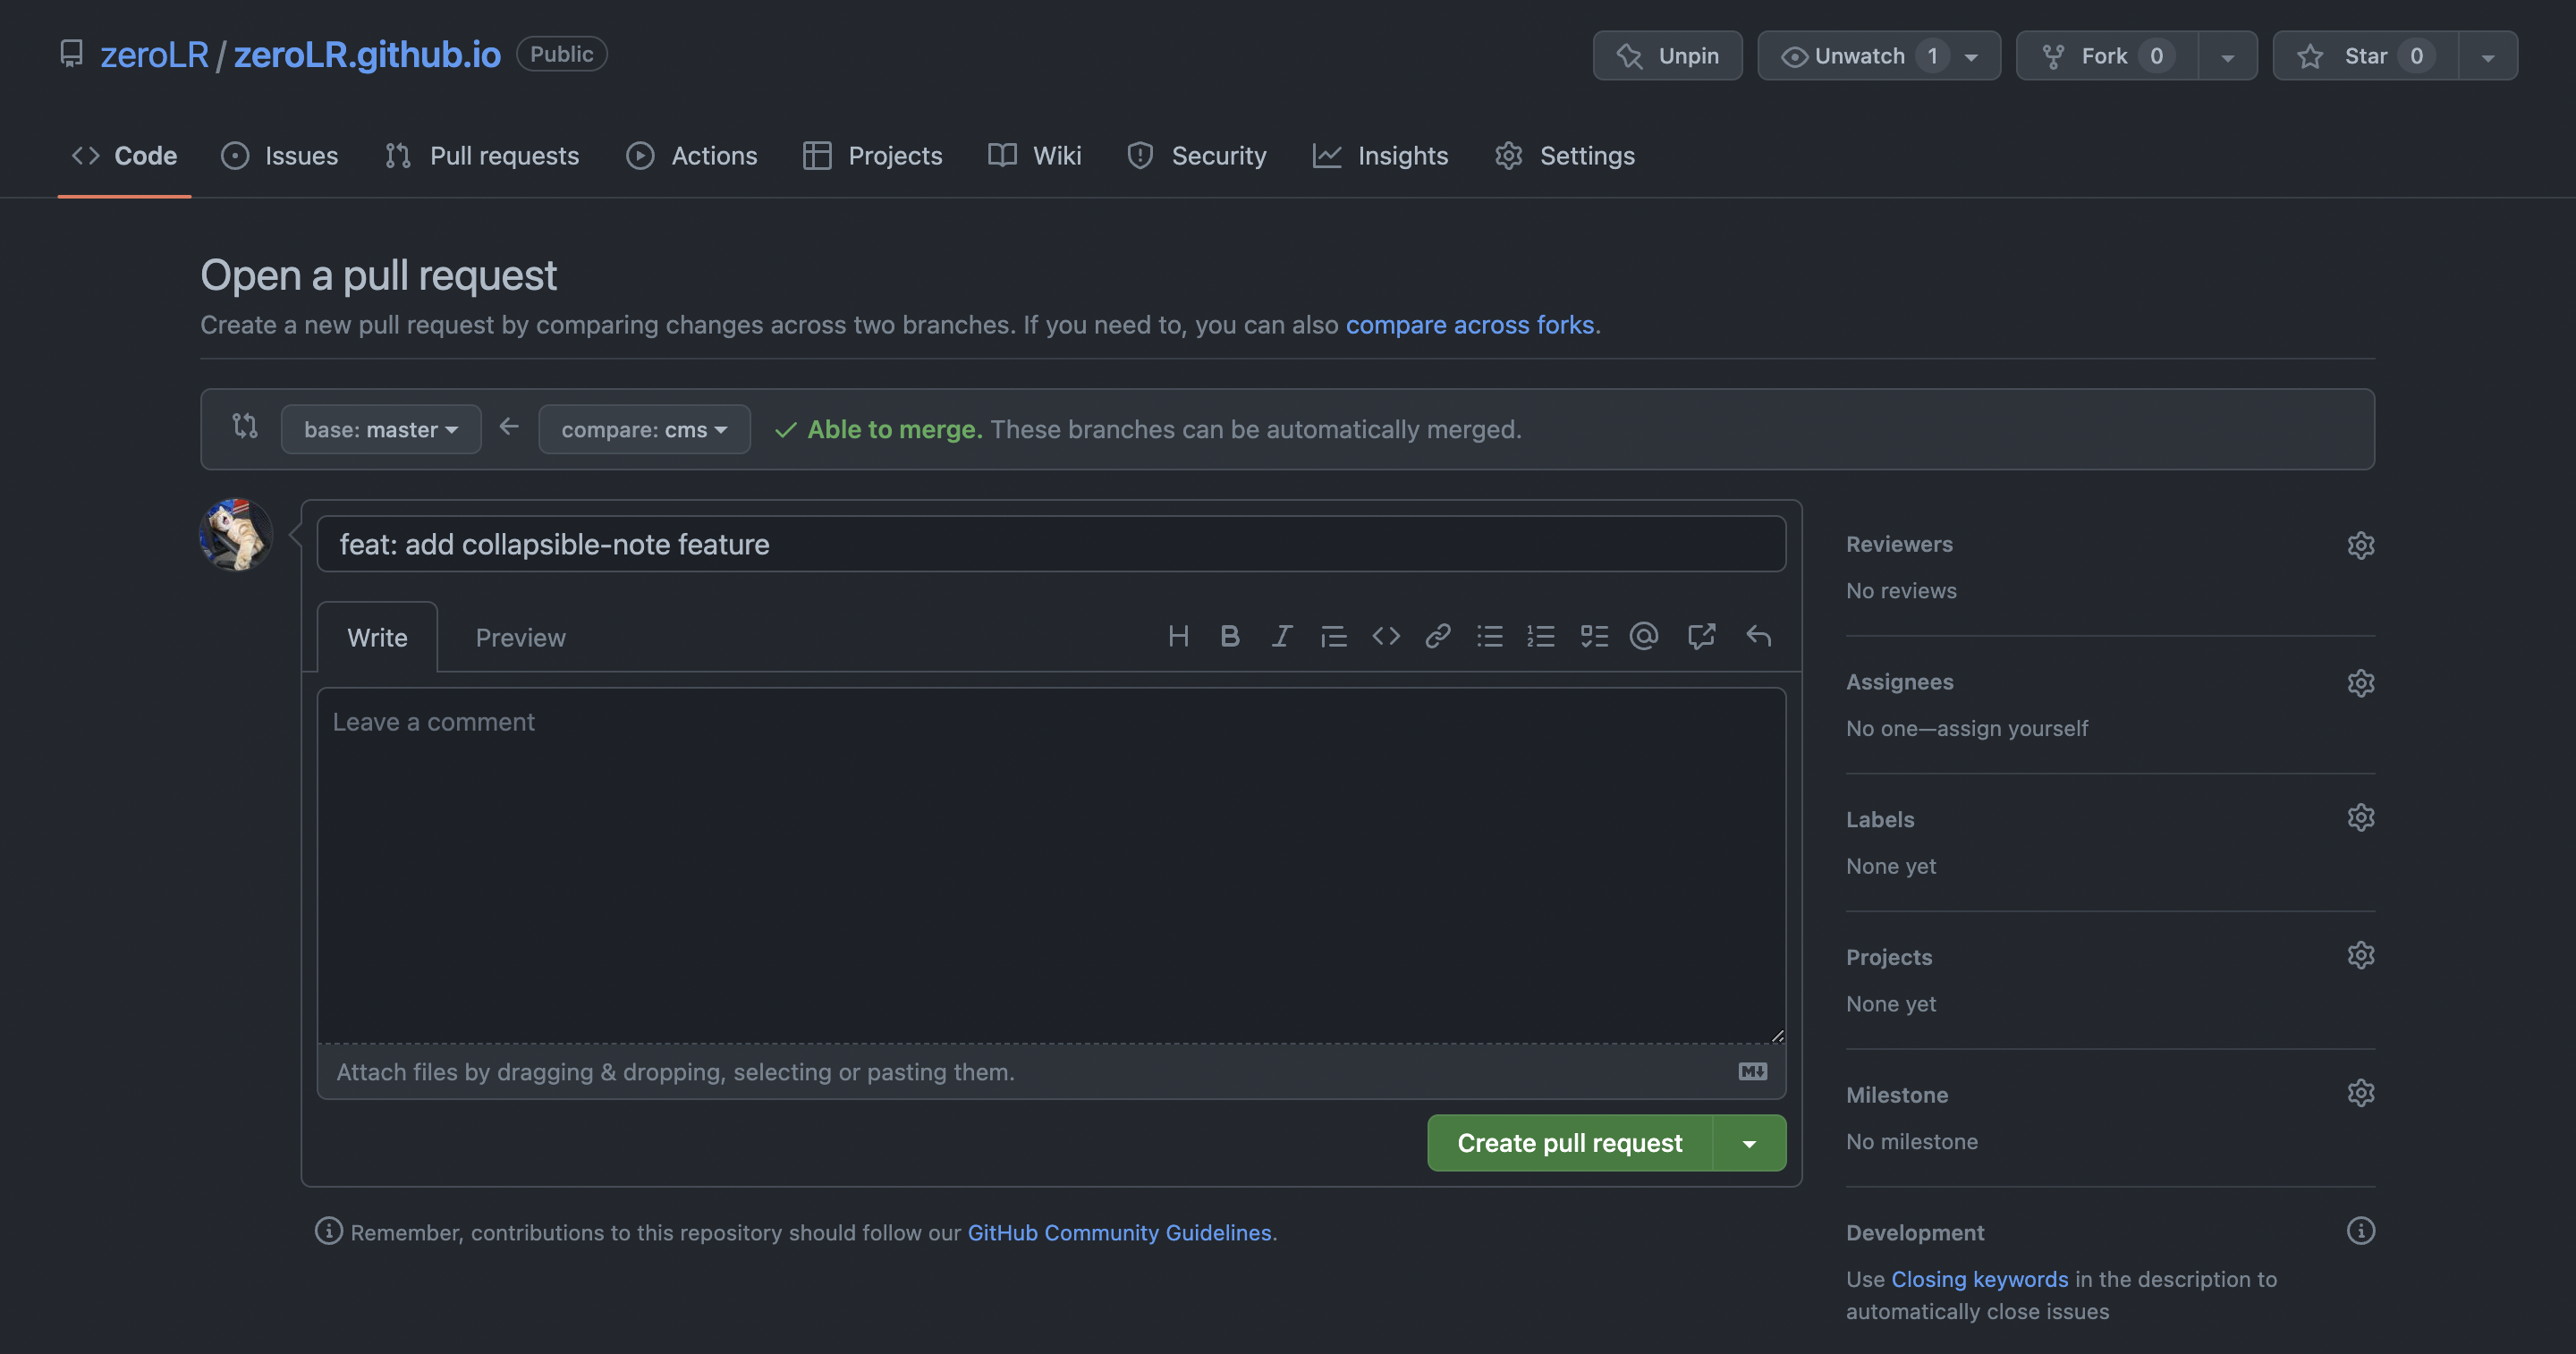
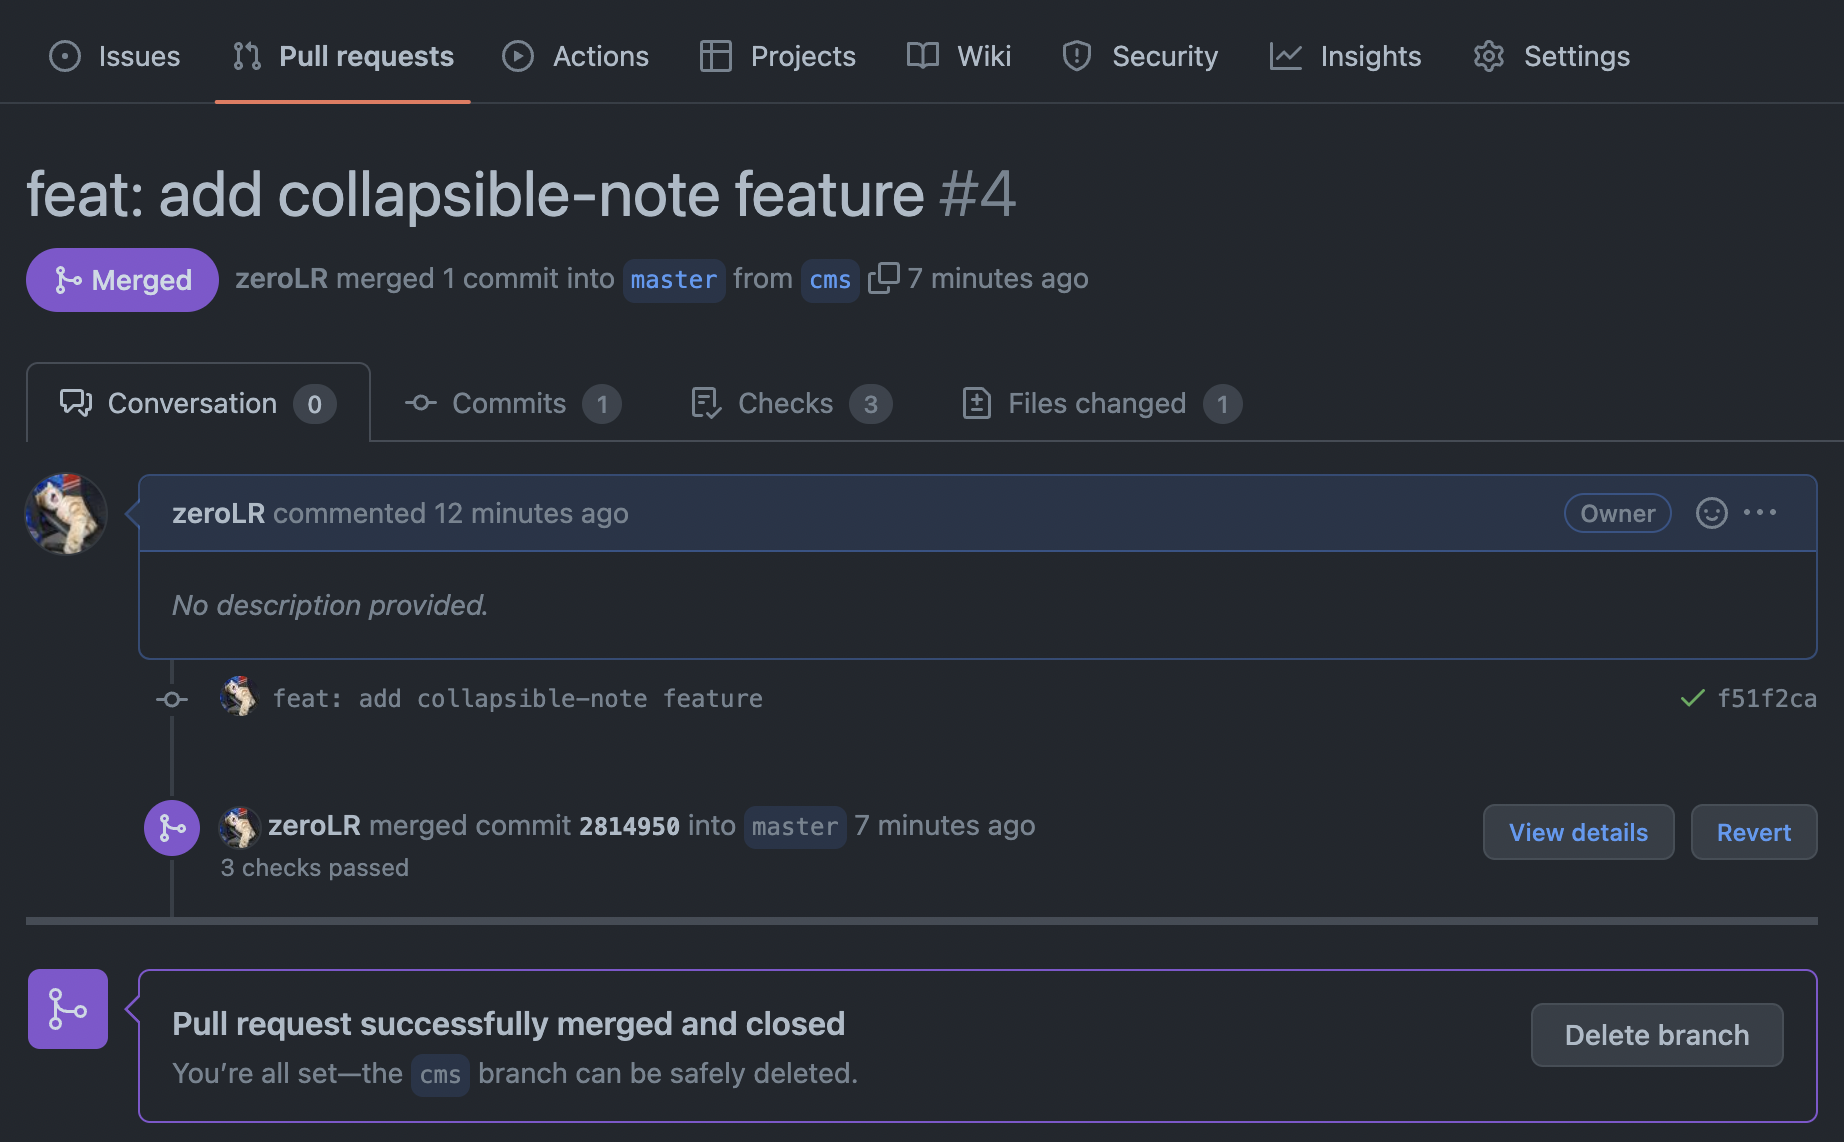
這時在 Pull requests 中就有個合併請求產生,合併前可以檢查 Files changed 中的資訊,確定變動的內容都沒有問題後就可以合併了。
合併之後記得回到 Settings → Pages 中將部署的 Branch 更改為 gh-pages 作為正式部署的網站。
使用 CMS 建立文章
這邊建立文章填入內容,注意 SLUG 欄位會變成文章的網站路徑,建議以英文加分隔符號的格式命名,讓人看網址就知道主題是什麼,COVER 欄位為文章預覽圖,填絕對路徑會從部署的檔案中查找,也可使用圖片 URL。
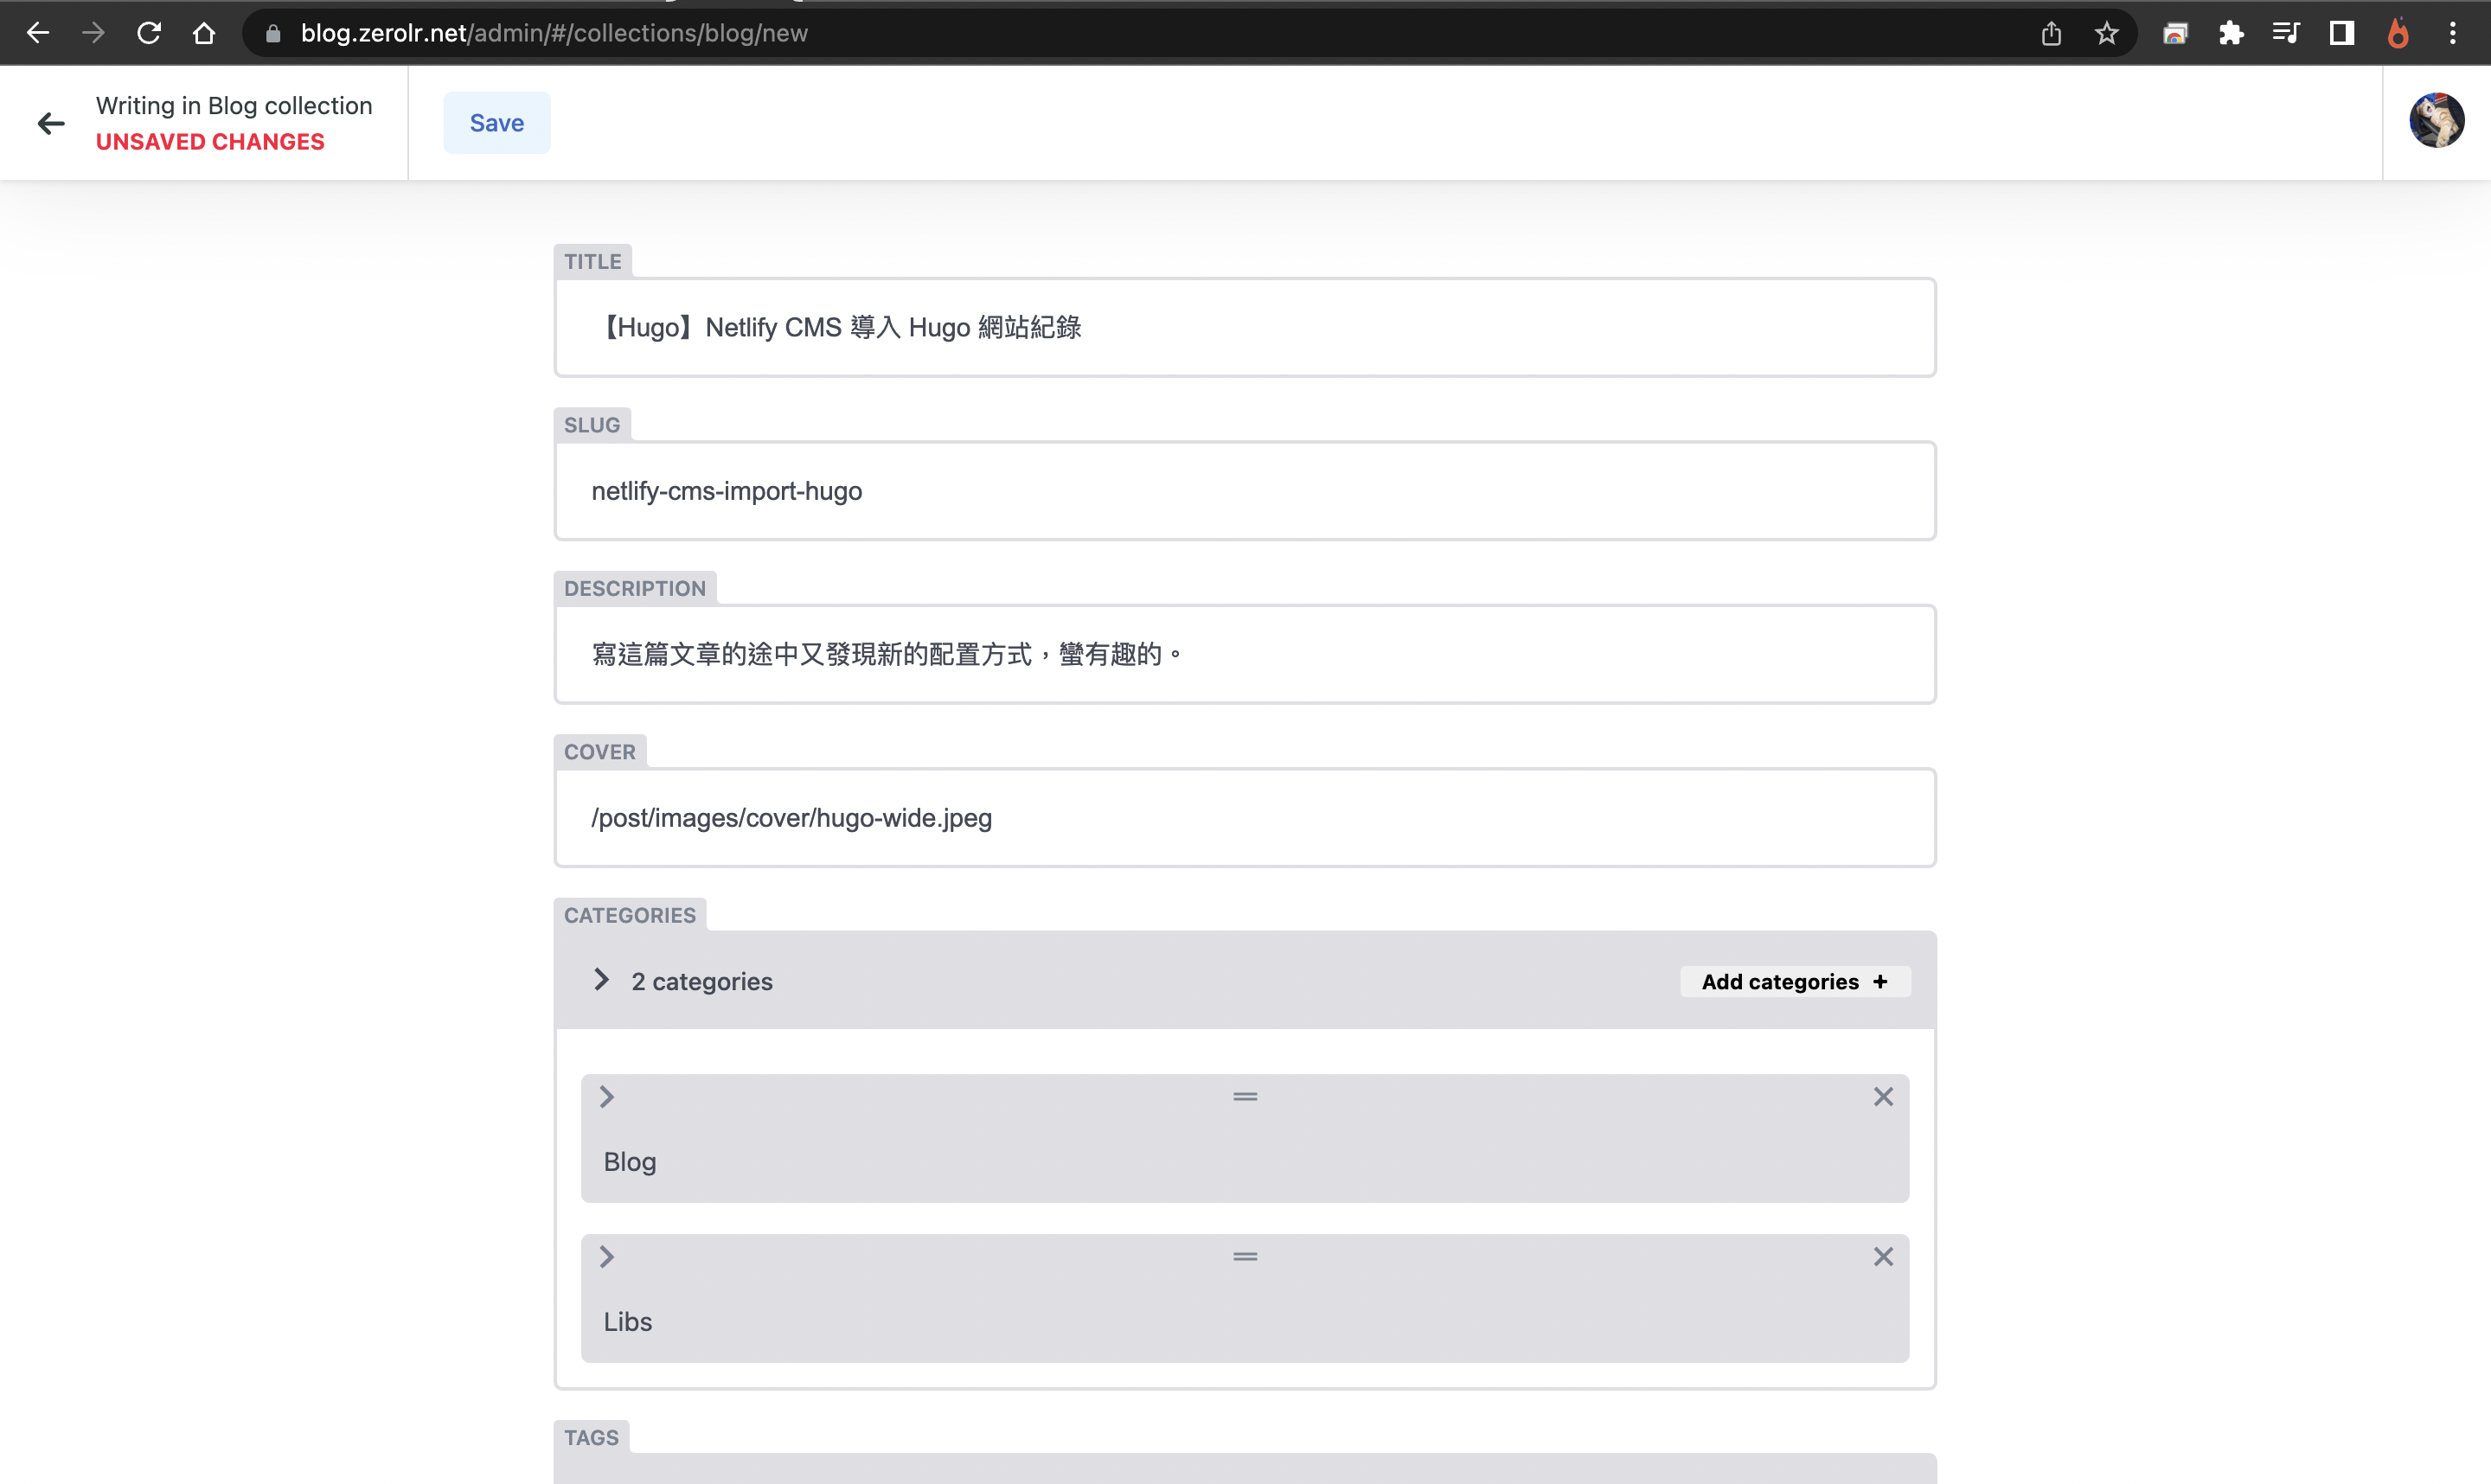
檢查完沒問題後就可以發布文章囉!
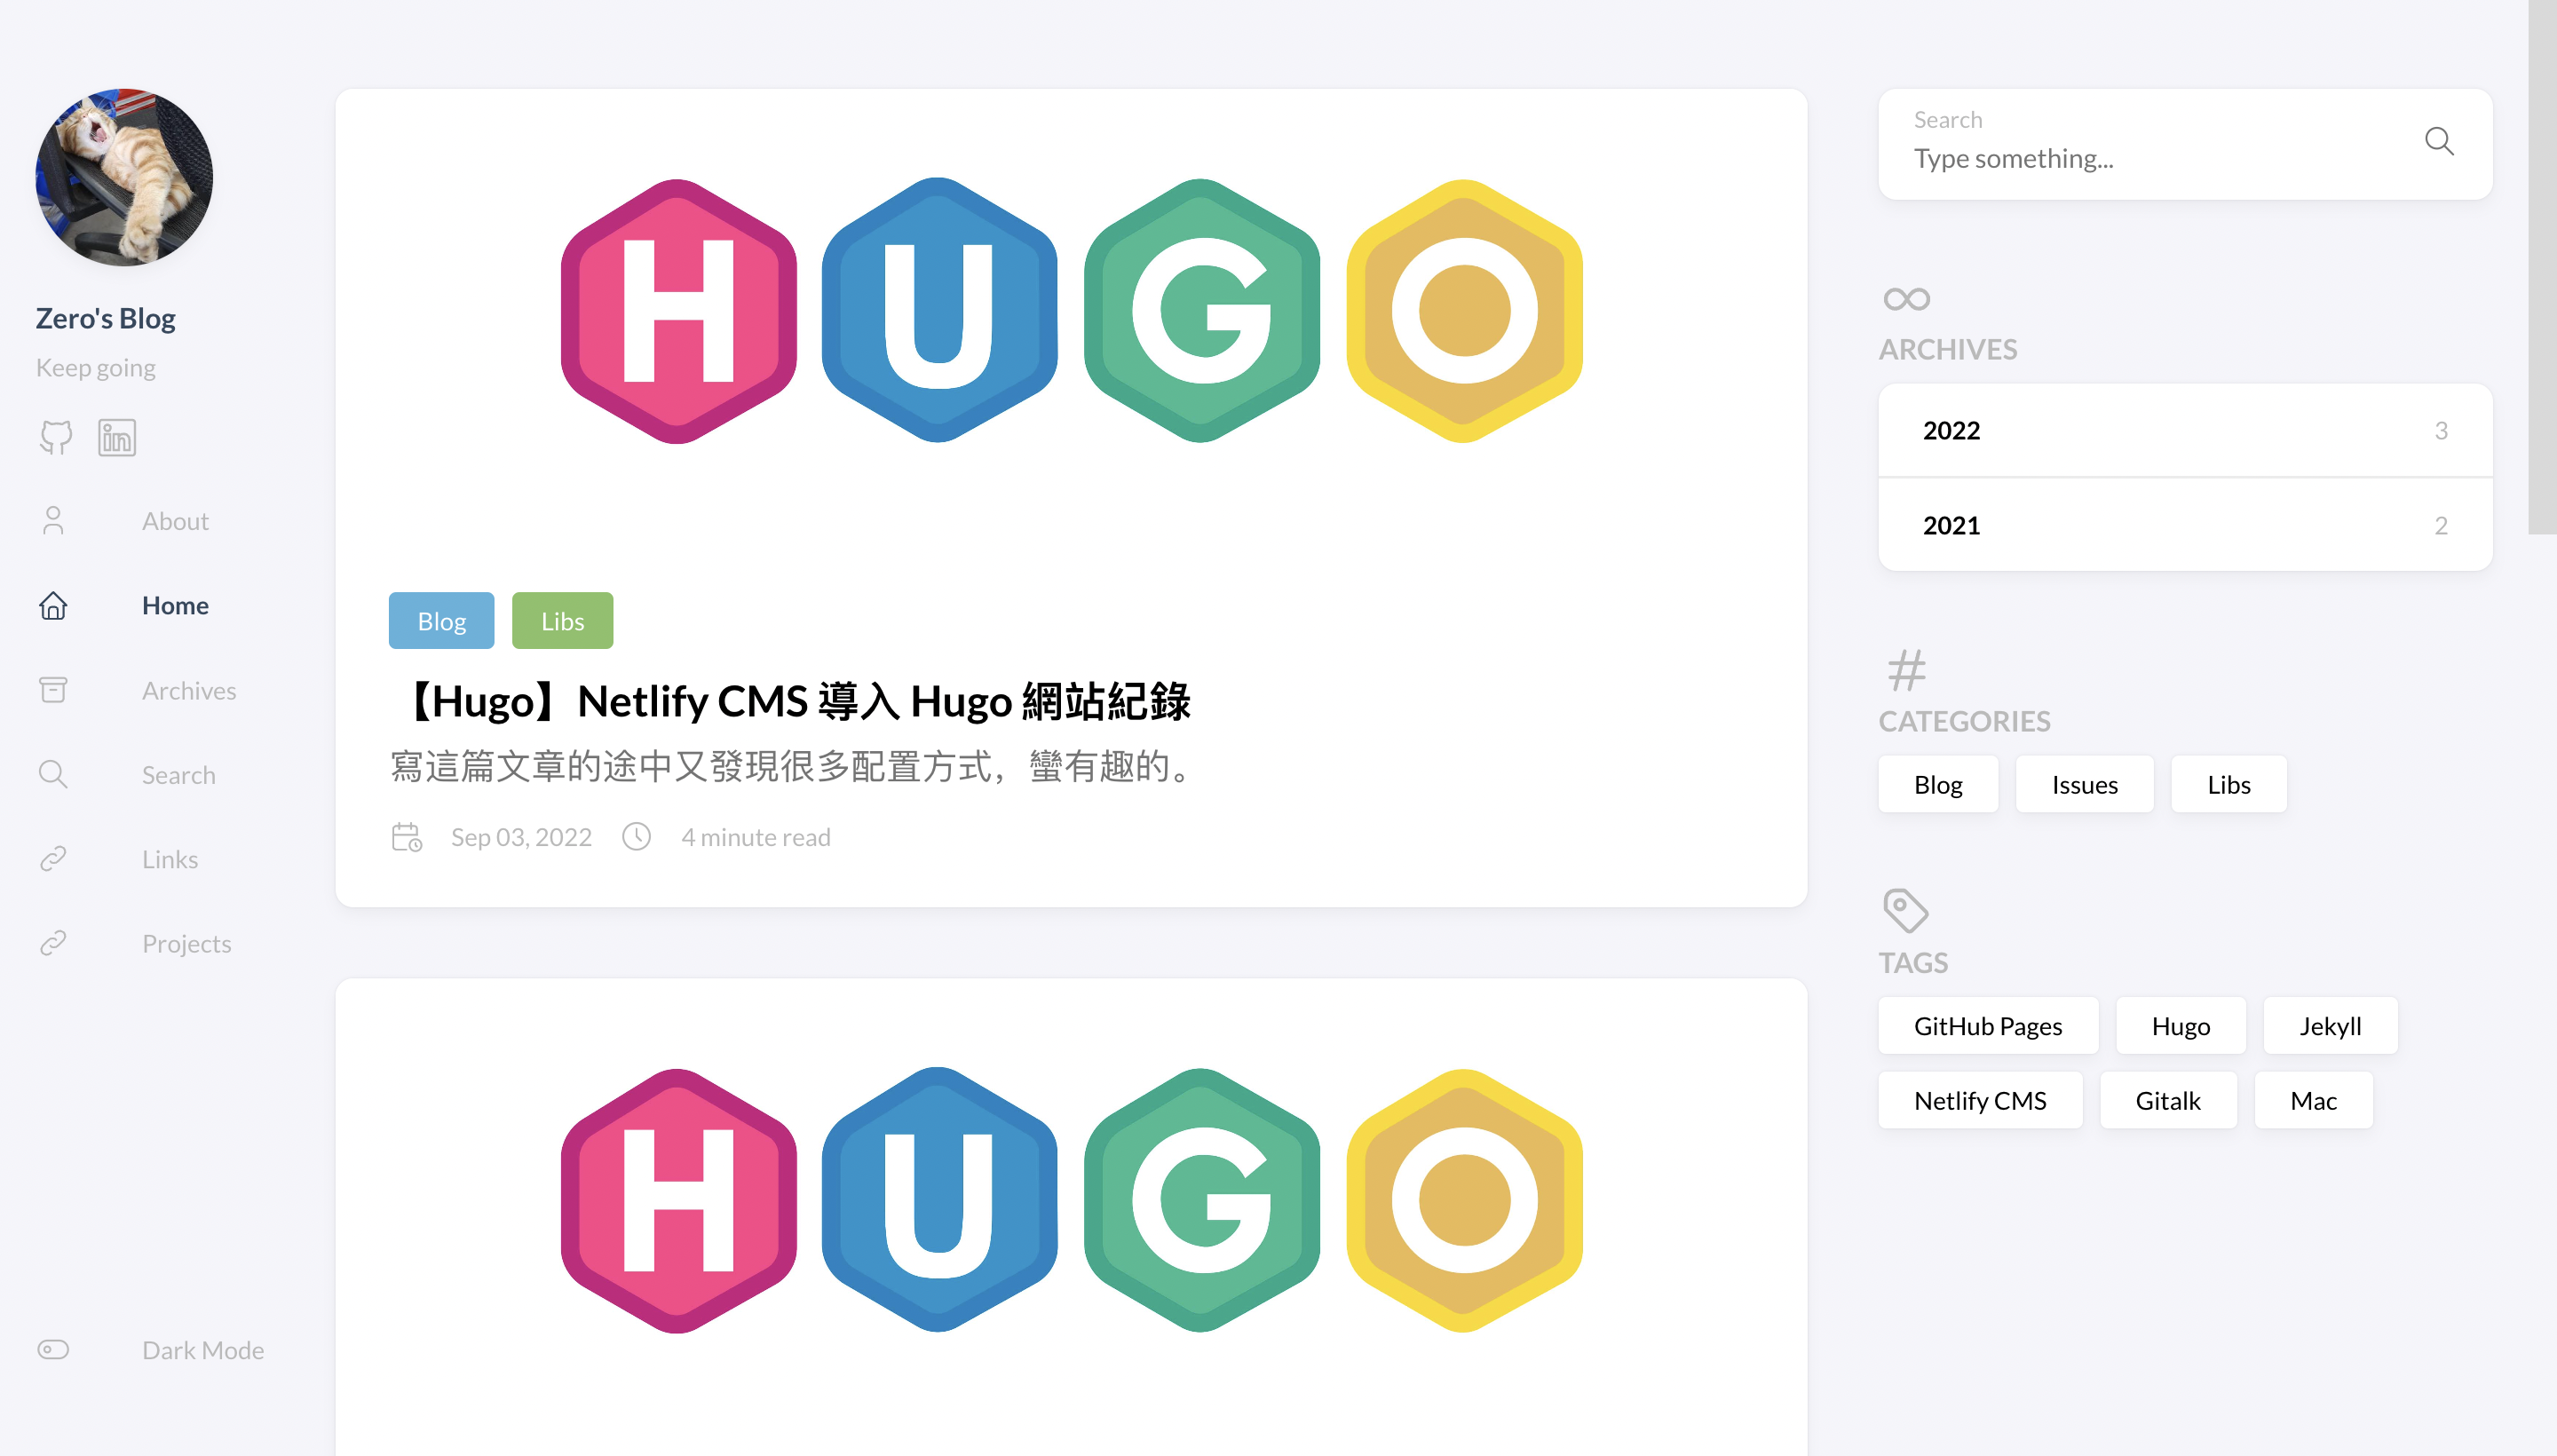
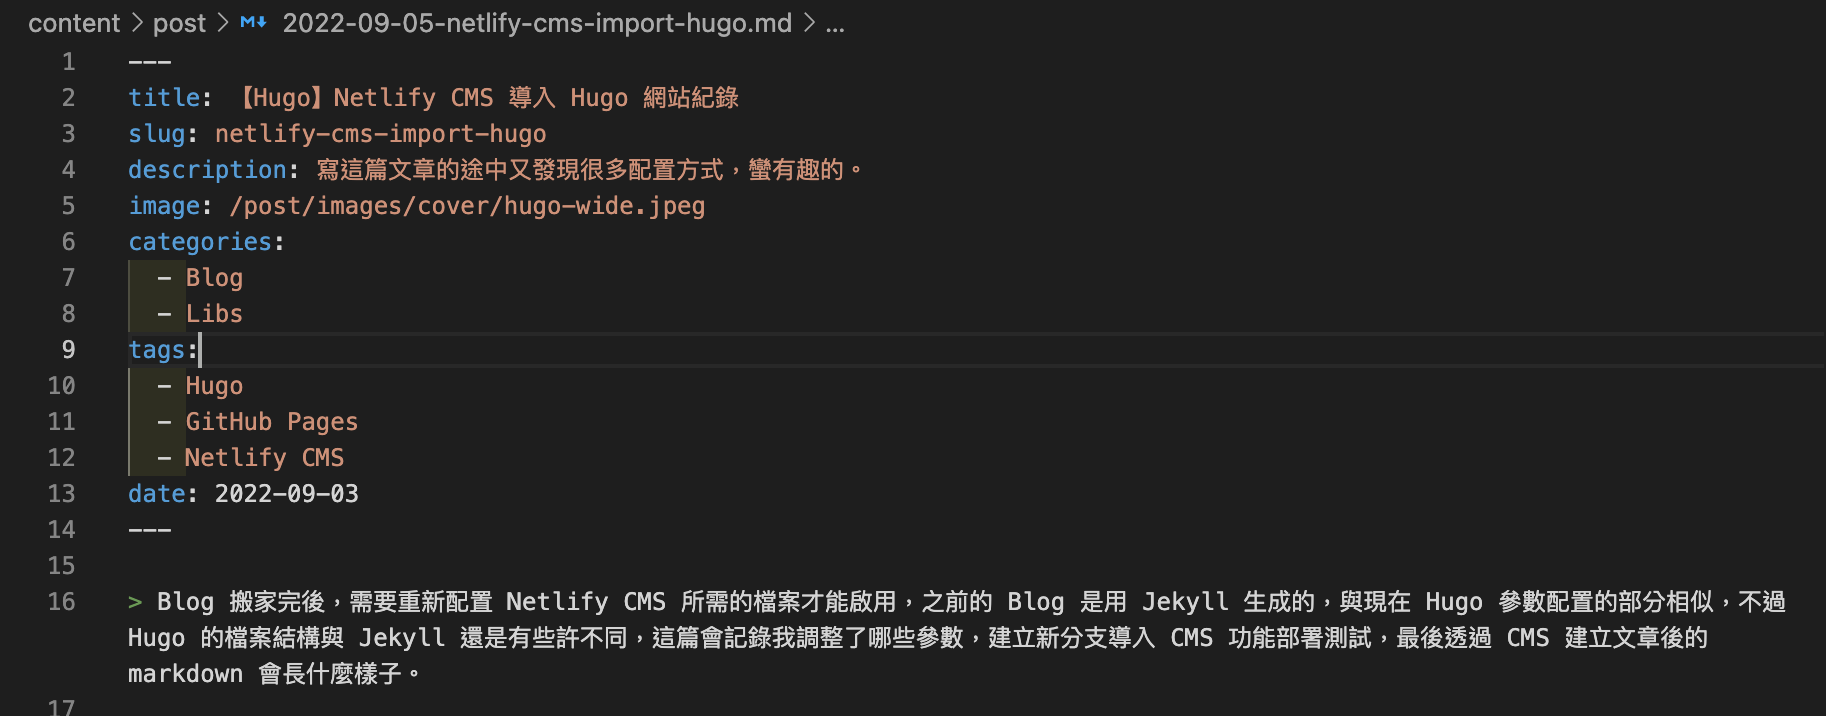
透過 CMS 發佈的文章檔案,上方的欄位配置就是依照編輯器中的內容產生的!
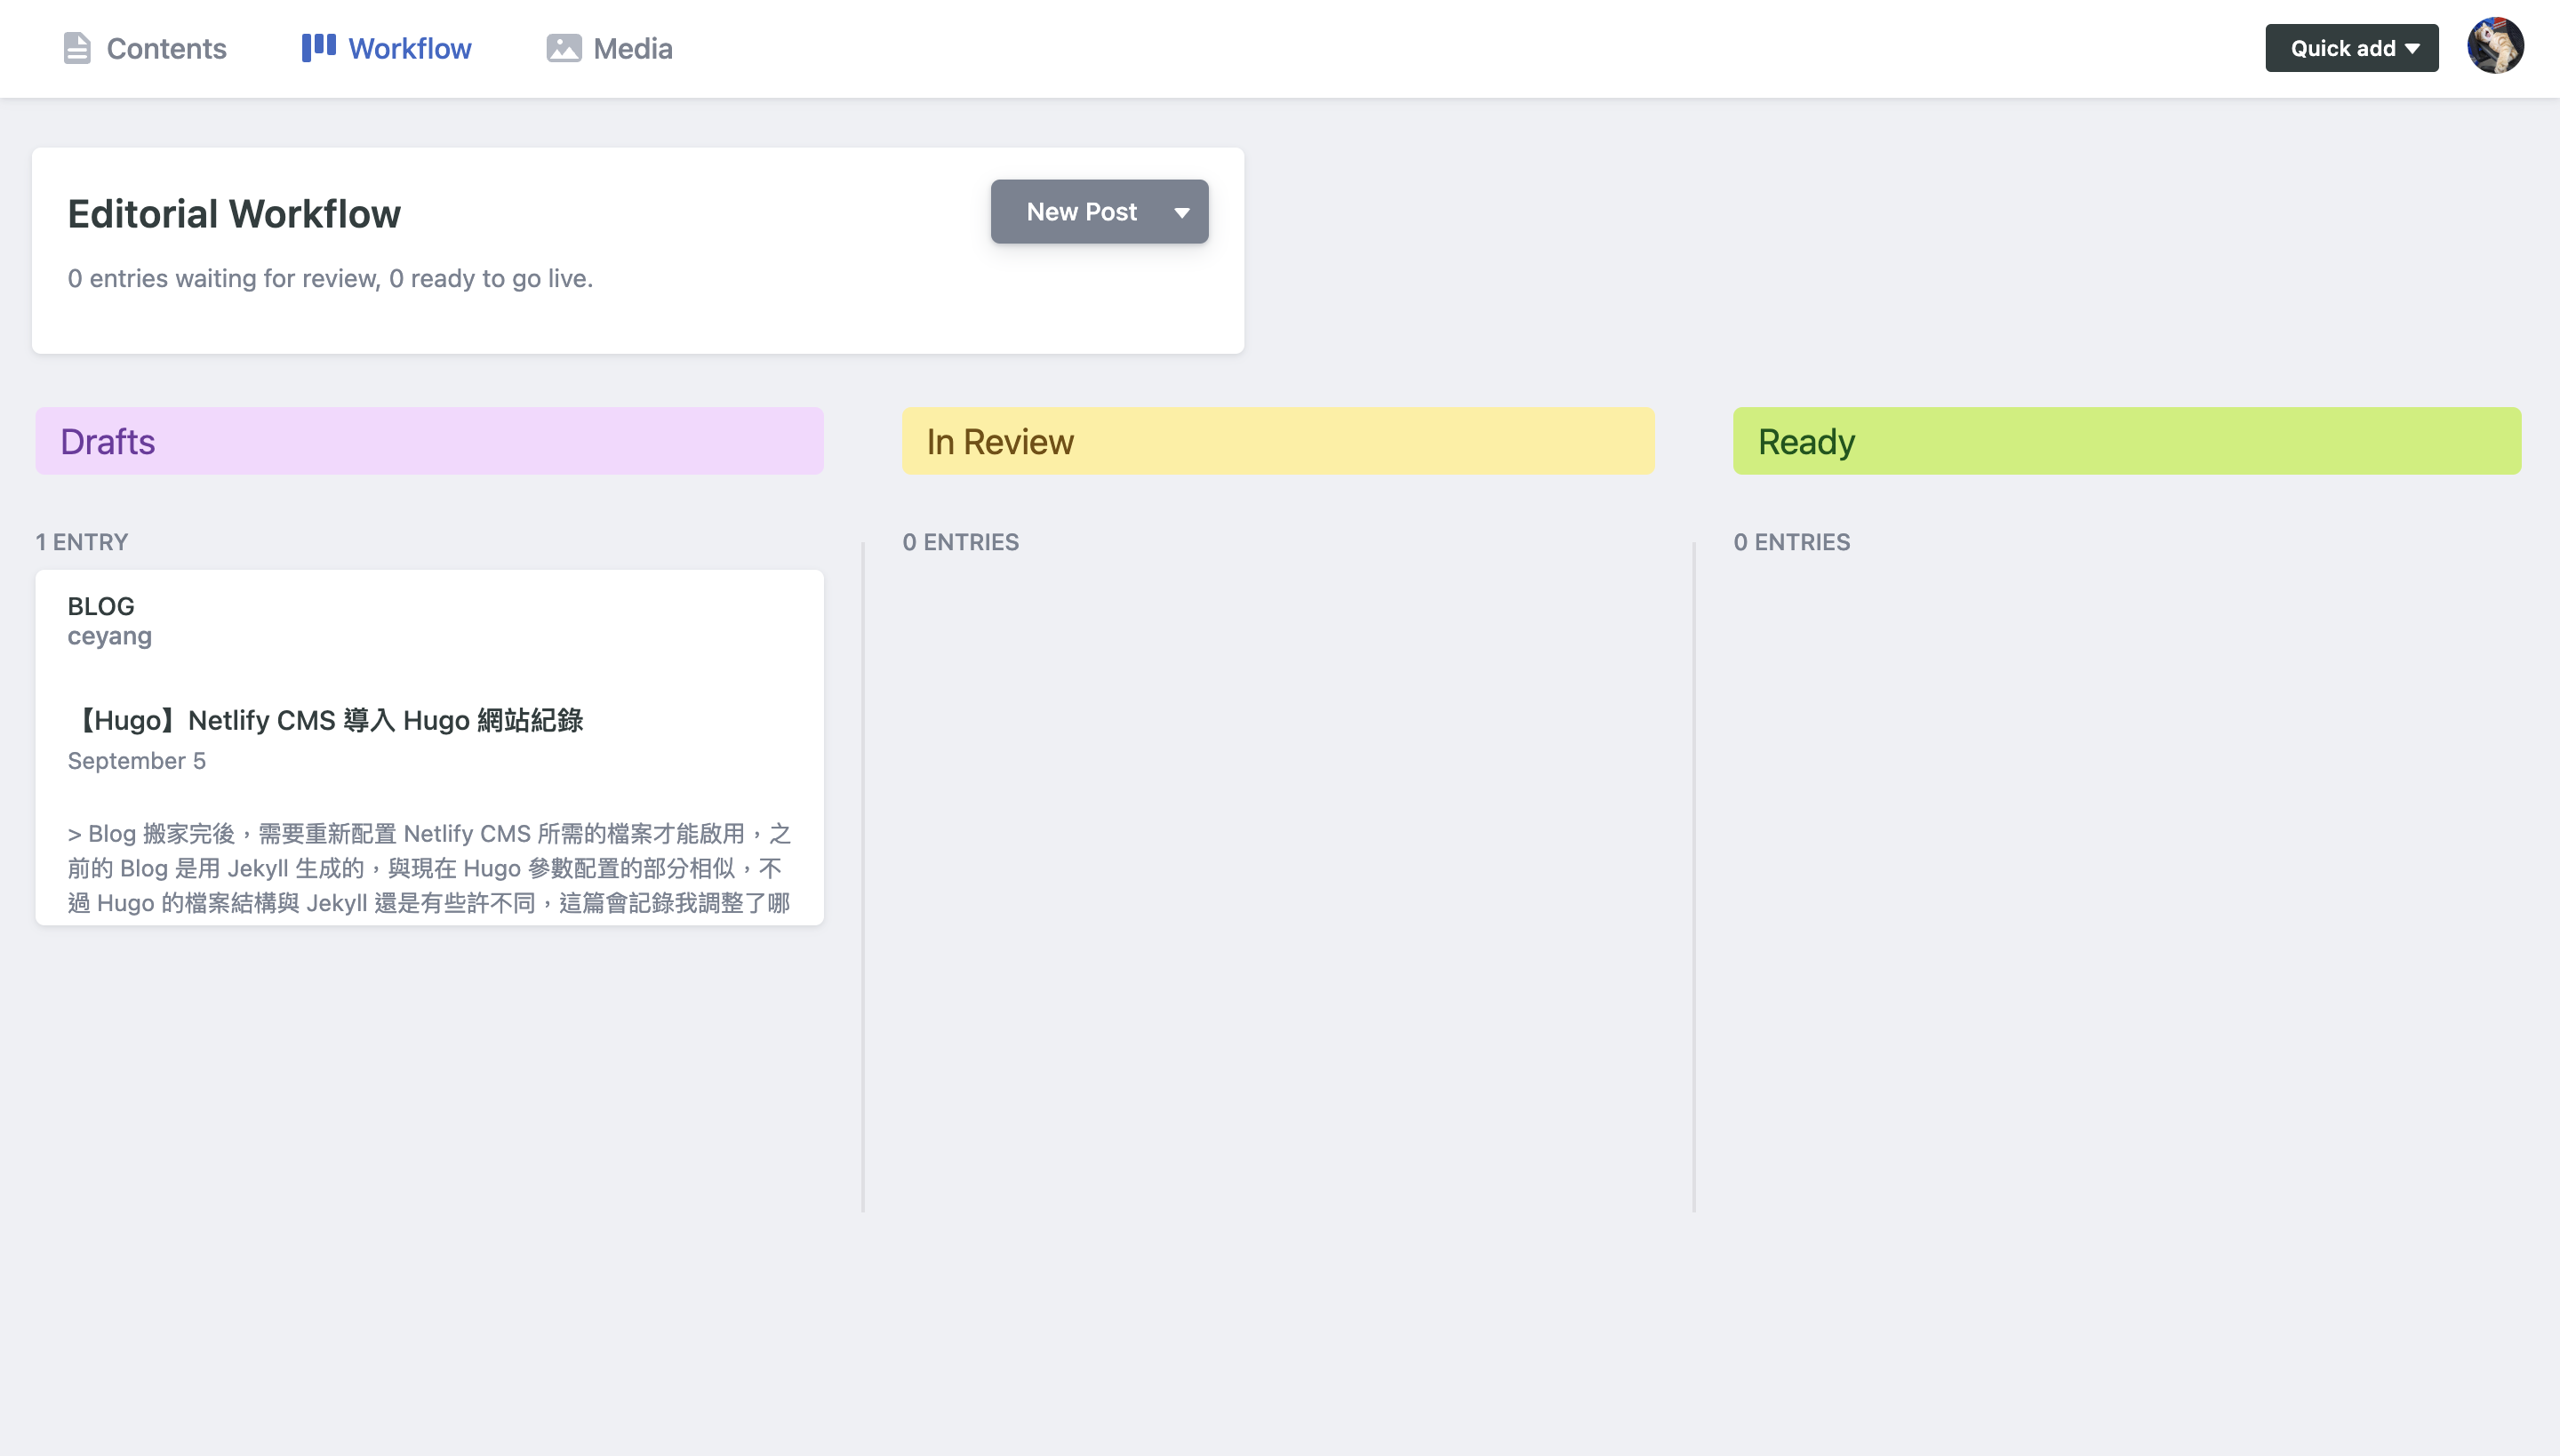
若有啟用 publish_mode: editorial_workflow ,文章會分成三種階段狀態儲存,分別為 Draft, In Review, Ready,一開始儲存會在 Draft 狀態,只有將狀態切換為 Ready 才能 publish 至網站中。
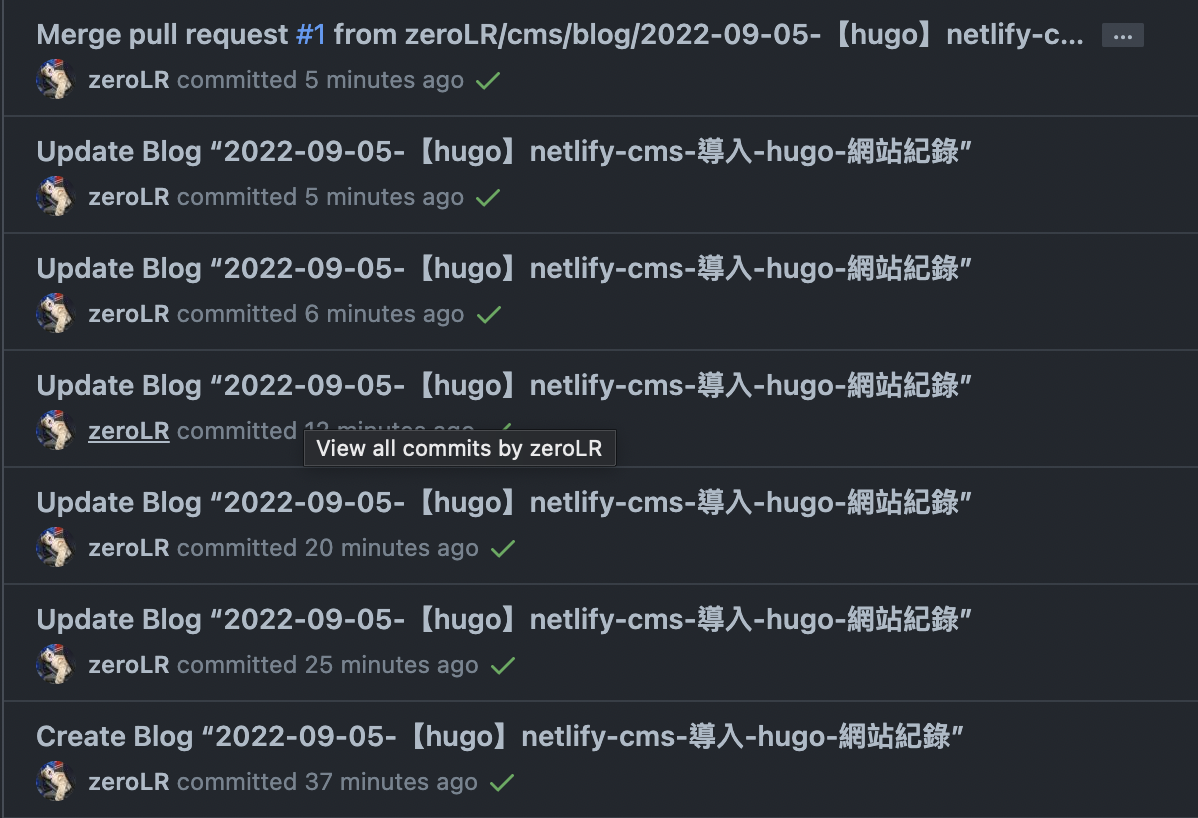
當文章不斷修改儲存時,網站會先建立暫存的 commit ,每一次的 Save 都會建立一次,直到 publish 後才會一併 push 至 repo 中,並且會自動建立 pull request 去合併中間產生的 commit 再 merge 回 repo 中。
安全問題
就跟使用其他需登入的網站服務一樣,有以下幾個點需注意:
- 除非是自己的電腦,在其他電腦上請開無痕視窗使用。
- 使用時會需要登入 GitHub,在 CMS 這邊登入完後會發現 GitHub 那邊也登入了,所以請記得離開或不用時登出。
- 使用未註冊 provider 的 GitHub 帳號登入時會被擋下來,若要增加共同編輯的帳號,需在其帳號下建立 OAuth APP,並且將 Client ID 及 Secret 提供給管理員去 provider 。
總結
重新再跑過一遍安裝流程後對配置又更熟悉了一點,也發現 CMS 連側邊欄位那些頁面也能編輯,之後會再更新上去。同時也是第一次嘗試另外開分支加入新功能測試部署,在嘗試的過程中一直在想這種做法是否合適,若對本篇做法有任何看法非常歡迎留言指教!
參考資料
- Netlify CMS - Hugo
- List widget form input prevents whitespace and commas
- Configuration Options
- 建立分支【教學 1 使用分支】 | 連猴子都能懂的 Git 入門指南 | 貝格樂(Backlog)


